Learning how to stop a sliding door from sticking without replacing the rollers can save you a repair bill, a weekend of hassle, and the frustration of wrestling with a door every single day. A sliding door that jerks, squeaks, or refuses to budge is usually not broken. In most cases, the rollers are fine. The real problem is dirt packed into the track, a door that has settled slightly out of alignment, or the wrong kind of lubricant gumming up the works. All three problems can be fixed with basic tools, a little patience, and no new parts at all.
Work through the fixes below one at a time, testing the door after each step. In many homes, the very first step — a thorough track cleaning — is enough to restore a smooth glide.
Why Sliding Doors Start Sticking
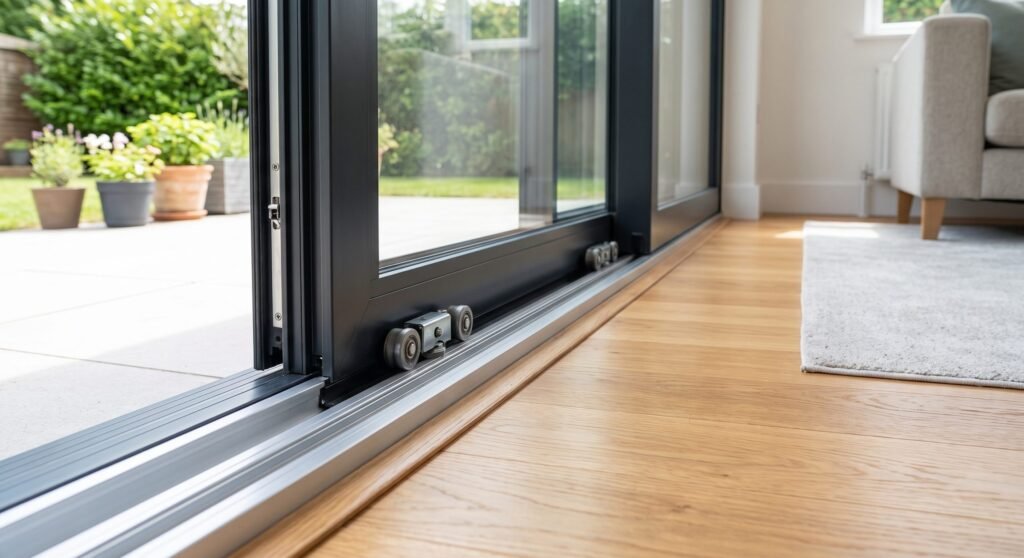
A sliding door glides on small wheels that run inside a metal track. That track sits at floor level, which means it collects everything that comes through the doorway: dust, sand, pet hair, crumbs, leaves, and grit tracked in on shoes. Over time, that debris packs down into a hard layer, especially in the corners and near the ends of the track where the wheels stop and start. The wheels then have to climb over or plow through that layer, which feels like sticking, jerking, or a door that needs a hard shove to get moving.
Alignment is the second common cause. Houses settle, frames shift slightly with temperature changes, and the screws that hold a door at the right height can work loose over time. When a door drops even a fraction of an inch on one side, the wheels no longer sit squarely in the track. One wheel may drag, the door may rub against the frame, or the latch side may catch. The door still moves, but every inch of travel takes extra effort.
The third culprit is lubrication, or rather the wrong kind of it. Many people reach for a thick oil or a general-purpose spray when a door starts to stick. Those products feel helpful for a day or two, but they attract dust and grit, which then form a sticky paste inside the track. The door ends up worse than before. A sliding door track needs a dry or silicone-based lubricant that does not attract dirt, and it needs it only after the track is clean.
Diagnose the Problem Before You Fix It
Open the door slowly and pay attention to where it sticks. Does it catch at the same spot every time, or is the resistance spread across the whole track? A single sticky spot usually points to debris or a dent in that section. Resistance across the full length suggests a dirty track overall, worn lubrication, or a door that has dropped on one side.
Next, look at the gap between the door and the frame. Stand back and check whether the vertical gap on the latch side is even from top to bottom. If the gap is wider at the top than at the bottom, or the other way around, the door is tilted and needs a height adjustment. Also check whether the door rubs against the top or bottom of the frame anywhere along its travel.
Tools and Supplies You Will Need
- A vacuum cleaner with a crevice tool, or a stiff brush
- An old toothbrush or a narrow bottle brush for the track grooves
- Warm water, dish soap, and a few rags
- A flathead screwdriver and a Phillips screwdriver
- Silicone-based lubricant spray, or a dry Teflon lubricant
- A putty knife or an old butter knife wrapped in a cloth
- A small block of wood and a hammer, for gently straightening a bent track
- A level, or a free level app on your phone
You do not need specialty tools for this job. If you have a sliding glass door, have a second person nearby for any step that involves lifting the door out of the track. Glass doors are heavy and awkward, and a dropped door can shatter or injure you.
Step 1: Clean the Track Thoroughly
Start with the door closed, and vacuum the exposed section of track. Use the crevice tool to reach into the grooves, and run it along the full length, including the corners where debris collects. Then slide the door to the other side and vacuum the section you just uncovered. You will be surprised how much grit comes out of a track that looked clean at a glance.
Next, scrub the track with warm soapy water and a stiff brush. Work the brush into both grooves, and pay special attention to the ends and the corners. For packed-in grime, wrap a rag around a putty knife and run it along the groove to scrape the layer loose, then brush again. Wipe everything out with a damp rag, and repeat until the rag comes away clean.
Dry the track completely before moving on. Standing water in a metal track can encourage rust, and a wet track will turn fresh lubricant into a mess. A dry rag followed by a few minutes of air drying is enough. Once the track is clean and dry, slide the door back and forth and test it. In many cases, this step alone transforms a door that needed both hands and a shoulder into one that glides with a fingertip.
Step 2: Adjust the Roller Height
Almost every sliding door has adjustment screws near the bottom edge, usually one at each end. They are often hidden behind small plugs or covers on the side of the door frame. Look for a small hole or slot near the bottom corners of the door, on the side facing you when the door is closed. Pop off any cover with a flathead screwdriver.
Turning the adjustment screw raises or lowers the wheel on that side of the door. On most doors, turning clockwise raises the door and counterclockwise lowers it. Make small adjustments, a quarter turn at a time, and test the door after each change. Your goal is a door that sits level, with an even gap along the latch side and no rubbing anywhere.
Start with the side that is dragging. If the door rubs at the bottom on the latch side, raise that side slightly. If the door catches at the top, lower that side a touch. Keep the changes small and symmetrical. Raising one side too far will tilt the door the other way and create a new sticking point. A level laid across the bottom rail, or simply checking the gap by eye, will tell you when the door is sitting square.
Step 3: Lubricate the Right Way
With the track clean and the door adjusted, lubrication is the finishing touch. Use a silicone-based spray or a dry Teflon lubricant, and apply a thin line along each groove of the track. Slide the door back and forth several times to spread the lubricant evenly over the wheels and the full length of the track. Wipe away any excess that squeezes out, since a puddle of lubricant will collect dust.
Never use thick oils, cooking spray, or general-purpose penetrating oils on a sliding door track. They feel slick at first, but they attract every speck of dust that crosses the doorway, and within weeks the track will be stickier than before. Graphite powder is sometimes suggested, but it can stain floors and clothing near the doorway, so silicone or dry Teflon is the safer choice for most homes.
Step 4: Fix a Bent or Damaged Track
Run your finger along the track grooves and feel for dents, raised spots, or sections where the metal has spread outward. A small dent can be eased back into shape with a block of wood and a hammer. Place the block over the dented section and tap gently, checking your progress often. The goal is a smooth groove, not a perfectly flat track, so work slowly and avoid hammering the metal directly, which can create new dents.
Step 5: Check the Frame, Weatherstripping, and Screen Door
A door that sticks only in damp weather may be rubbing against swollen weatherstripping or a wooden frame that has absorbed moisture. Inspect the weatherstripping along the sides and top of the frame. If it is torn, flattened, or peeling away, it can bunch up and drag against the door. Replace damaged weatherstripping with the same type and size, which is a cheap fix that also improves insulation.
If your door has a screen door on a separate track, check that too. A screen door that has slipped off its track or sagged on one side can rub against the main door and feel exactly like a sticking main door. Lift the screen door back into its track and adjust its own small rollers if needed, using the same quarter-turn method described above. If the problems started after a storm or a house move, check that the whole frame is still square by measuring the diagonals of the opening. A frame that is badly out of square is a job for a professional, but a small shift can often be corrected by adjusting the door itself.
When New Rollers Actually Are the Answer
This guide is built around avoiding roller replacement, but honesty matters: sometimes the rollers really are worn out. Signs include wheels that are visibly cracked, flat-spotted, or missing chunks, wheels that do not turn at all when you spin them by hand, or a door that still drags badly after a clean track, careful adjustment, and proper lubrication. If you lift the door out and the wheels wobble on their axles or grind when spun, replacement is the right call.
Even then, try the cheaper steps first, because a new set of rollers installed into a filthy track will wear out quickly and stick again. Clean the track, adjust the door, and lubricate properly, and you will either fix the problem or confirm that the rollers are genuinely the cause. Either way, you have not wasted the effort.
Pros and Cons of Fixing It Without New Rollers
The advantages are clear. The fix is free or nearly free, it takes under an hour in most cases, and it requires no special skills or parts ordering. You also learn how your door works, which makes future maintenance easy. Many homeowners find that a door they assumed was worn out simply needed a good cleaning and a small adjustment.
Mistakes to Avoid
- Lubricating a dirty track, which turns grit into a sticky paste and makes the problem worse.
- Using thick oil or cooking spray instead of silicone or dry lubricant.
- Turning adjustment screws in large amounts, which tilts the door and creates a new sticking point.
- Forcing a stuck door with a hard shove, which can bend the track or crack the glass.
- Lifting a heavy glass door alone, or letting it lean unsecured once it is out of the track.
- Ignoring the screen door, which can mimic a sticking main door.
- Over-tightening small screws until they strip, especially the adjustment screws.
A Simple Maintenance Routine That Prevents Sticking
Once your door glides smoothly, keeping it that way takes very little effort. Vacuum the track once a month, or more often if you have pets or live near a dusty area. Wipe the grooves with a damp cloth when you notice grit building up, and reapply a light coat of silicone lubricant a few times a year. Check the adjustment screws whenever the door starts to feel slightly heavier than usual, and catch the problem early, before it becomes a full stick.
Keep the area outside the door clear of leaves and dirt, and shake out door mats regularly. The same kind of simple routine keeps other household fixtures working well too, as shown in guides such as How to Stop a Washing Machine From Shaking During Spin Cycle and Remove Water Stains From Wood Furniture Without Sanding, where a careful diagnosis and a basic fix often beat calling in a professional.
FAQ
Why does my sliding door stick only in one spot?
A single sticky spot usually means debris packed into that section of track, or a small dent in the groove at that point. Clean that section thoroughly, feel for a dent, and gently tap out any raised metal with a wood block. If the spot is near the end of the track, check for debris packed into the corner.
Can I use WD-40 on a sliding door track?
It is not the best choice. General-purpose sprays like that are thin oils that attract dust, so the track often gets stickier within weeks. A silicone-based spray or a dry Teflon lubricant stays slick without collecting grit, and it is the better long-term option.
How do I find the roller adjustment screws?
Look near the bottom corners of the door, on the side of the frame facing into the room. There is usually a small hole, slot, or plug cover at each end. Pop the cover off with a flathead screwdriver, and you will see the adjustment screw inside. Turn it a quarter turn at a time and test the door after each change.
Should I take the door out of the track to clean it?
Usually not. Most track cleaning can be done with the door in place by sliding it to each side in turn. Removing a heavy glass door is risky and unnecessary unless you need to inspect or replace the wheels themselves. If you do remove it, always have a second person help, and lay the door flat on a soft surface.
What if the door still sticks after cleaning and adjusting?
Check the screen door, the weatherstripping, and the frame for rubbing or swelling. If those are fine and the door still drags, inspect the wheels themselves. Cracked, flat, or seized wheels are the one problem this guide cannot fix without new parts, and at that point roller replacement is the honest next step.
How often should I clean a sliding door track?
A quick vacuum once a month and a deeper scrub a few times a year is enough for most homes. Doors near beaches, dusty yards, or busy pet traffic may need cleaning more often. Cleaning early, when the door first feels slightly heavier, prevents the hard-packed grime that causes a full stick.