
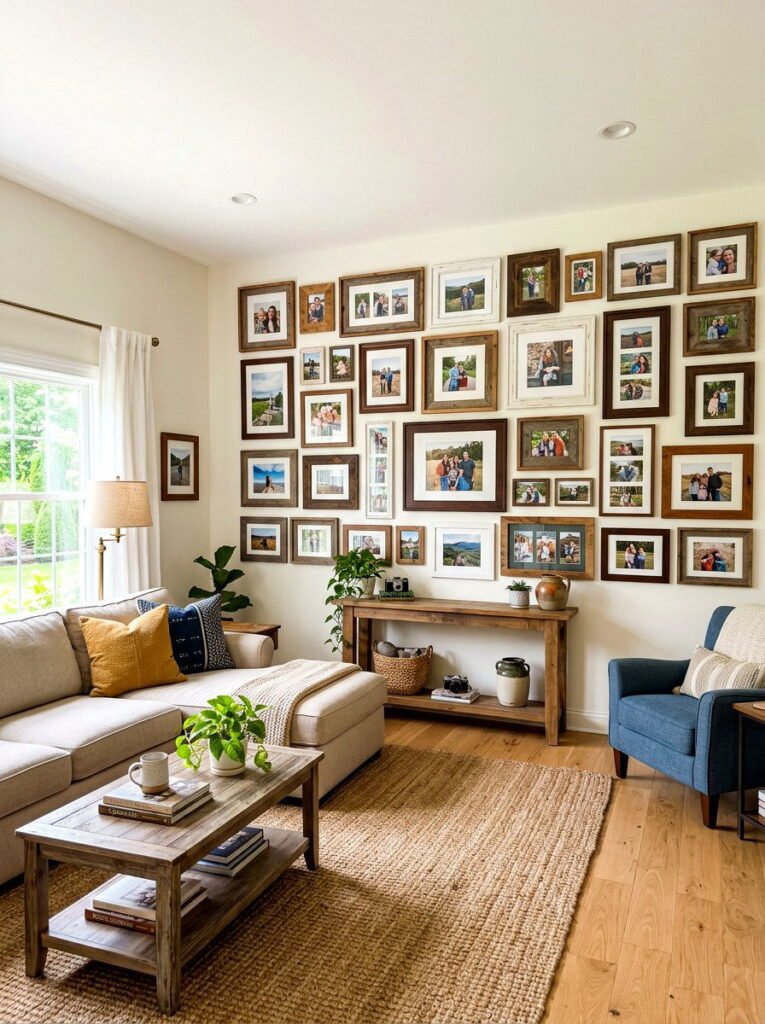
Blank walls make even the nicest apartment feel temporary — but most leases forbid nails, screws, and anything that leaves a mark. Learning how to hang pictures without nails in an apartment is the renter’s superpower: with the right adhesive strips, removable hooks, and a few creative tricks, you can fill your walls with art, photos, and mirrors and still get your full security deposit back. This guide covers six proven no-nail methods with step-by-step instructions, honest weight limits, gallery-wall planning tips, damage-free removal, and the mistakes that cost renters money at move-out.
Know Your Walls Before You Hang Anything
Thirty seconds of detective work prevents most failures. Knock on the wall: a hollow sound means drywall, the most common apartment wall and the friendliest surface for adhesives. A hard, solid sound suggests plaster or concrete. Adhesive strips bond best to smooth, clean, painted drywall. They struggle on heavily textured walls, raw brick, concrete, and wallpaper — the adhesive cannot grip uneven or dusty surfaces reliably.
Also note the room. Bathrooms and kitchens run humid, and moisture weakens most adhesives over time, so choose humidity-rated products for those spaces or keep art in drier rooms. If your lease has a decorating clause, skim it once: the vast majority of leases ban holes but say nothing about removable adhesives, which is exactly the gap these methods exploit.
Method 1: Adhesive Picture-Hanging Strips
Interlocking adhesive strip sets are the workhorse of nail-free hanging. Used correctly, they hold framed art surprisingly well and remove cleanly. Follow these steps exactly — most failures come from skipping the prep:
- Clean the wall with rubbing alcohol and let it dry completely. Household cleaners leave residue that weakens the bond; skip them for this job.
- Plan your layout first. Hold the frame up, mark the top edge lightly with painter’s tape, and decide on placement before any adhesive touches the wall.
- Press strip pairs together until they click, peel off one backing, and press the strips firmly onto the back of the frame — one set in each corner for medium frames, more sets for larger ones.
- Peel the remaining backings and press the frame to the wall for a full 30 seconds, applying firm, even pressure across each strip location.
- Pull the frame off the wall (the strips separate at their interlocking faces), press the wall-side strips hard for another 30 seconds, then wait one full hour before reattaching the frame. That curing hour dramatically increases holding strength.
Weight limits depend on strip size: small sets typically hold around 4 pounds, medium sets around 6 to 9 pounds, and large sets up to about 16 pounds when you use enough of them. When in doubt, add an extra set — distributed weight is the secret. Removal is just as important: stretch each tab slowly straight down along the wall (never yank outward) until it releases.
Method 2: Removable Adhesive Hooks
Adhesive hooks are ideal for things strips cannot easily hold: canvas art with a wire back, unframed prints clipped to a hanger, lightweight mirrors, tapestries, and string lights woven into a display. Choose hooks rated for at least double the weight of your item — ratings assume perfect conditions, and real walls are never perfect.
Installation mirrors the strip method: clean with rubbing alcohol, press firmly for 30 seconds, and wait the full recommended curing time before hanging anything. For canvases, hang the canvas wire over the hook; for prints, clip the print to a wooden hanger or a pair of binder clips and hang that. Space multiple hooks to share the load on wider pieces rather than trusting a single center hook.
Method 3: Picture Ledges You Lean Art On
Sometimes the smartest move is barely touching the wall at all. Picture ledges — narrow shelves with a lip — let you lean framed prints, small canvases, and photos in overlapping layers for an effortlessly styled look. Freestanding tabletop ledges sit on dressers, desks, and consoles with zero wall contact, making them the most deposit-safe option in this entire guide.
Wall-mounted ledges usually require screws, so treat those as a landlord-conversation item rather than a stealth install. A good compromise is a tall, narrow leaning floor ledge or a decorative ladder shelf: it stands against the wall, holds multiple pieces at different heights, and leaves the wall completely untouched.
Method 4: Tension Rods and Wire Display Systems
A tension rod wedged inside a window frame, alcove, or narrow hallway needs no hardware at all — spring pressure holds it in place. Hang lightweight frames, clipboards, or curtain clips with prints from S-hooks on the rod for an instant rotating gallery. This works beautifully in kitchens and entryways where wall space is awkward.
For a bigger statement, string a wire display between two adhesive hooks: attach a thin steel cable or sturdy twine, then hang prints with small metal clips along its length. Two or three parallel wires create a photo-wall effect that holds dozens of prints with only four small adhesive points on the wall.
Method 5: Washi Tape, Clips, and Creative Lightweight Displays
For posters, prints, and photos without frames, go delightfully low-tech:
- Washi tape frames: outline each print directly on the wall with patterned washi tape. It looks intentional and graphic, holds paper securely, and peels off cleanly.
- Binder clips on adhesive hooks: clip the top edge of a poster between two large binder clips, then hang the clips from small hooks. Instant, cheap, and endlessly rearrangeable.
- Pant hangers: wooden trouser hangers with clips grip art prints beautifully and hang from a single hook — a favorite stylist trick.
- Clipboards in a grid: mount a grid of clipboards with one adhesive strip each, then swap the art inside whenever the mood strikes. It doubles as a rotating gallery.
These methods suit paper and cardstock only — keep framed glass far away from tape-only solutions.
Method 6: Skip the Wall Entirely With Easels and Floor Displays
Large art does not need the wall at all. A tabletop easel on a console, bookshelf, or mantel displays a statement piece at eye level with zero wall contact. For oversized frames, simply lean them on the floor against the wall — galleries do this deliberately, and it looks confident rather than unfinished when the frame is large enough. Layer a smaller frame in front of a larger one for depth. The only rule: keep leaning art away from high-traffic paths where it could be knocked over, and never lean heavy pieces where children or pets play.
How Much Weight Can No-Nail Methods Really Hold?
Honest numbers keep your art — and your deposit — safe:
- Small adhesive strip sets: up to about 4 pounds — small frames and photos.
- Large adhesive strip sets (multiple): up to about 16 pounds — medium framed prints and small mirrors.
- Removable adhesive hooks: roughly half a pound to 7 or 8 pounds depending on size — canvases, tapestries, and light mirrors.
- Washi tape and clips: paper only — posters and unframed prints.
- Freestanding ledges and easels: 20 pounds or more — limited only by the furniture itself.
One honest caveat: a heavy, glass-fronted mirror over a bed or sofa is the one item worth a landlord conversation about a single properly anchored hook. No adhesive is the right tool for 25 pounds of glass above where you sleep.
Plan a No-Nail Gallery Wall Like a Designer
A gallery wall looks effortless only when it is planned. Cut paper templates the size of each frame, label them, and tape them to the wall with painter’s tape. Live with the arrangement for a day — you will immediately spot what feels off. Keep 2 to 3 inches of space between frames for a cohesive look, start with the largest piece slightly off-center, and build outward. Hang the center of the arrangement at about 57 inches from the floor, the average human eye level galleries use. Mix frame sizes and orientations, but repeat one or two frame colors to keep it unified. Photograph the final template layout before you start sticking anything — it is your map if a piece needs repositioning.
Removing Everything Without Losing Your Deposit
Removal day determines whether these methods were truly damage-free. Work slowly, one piece at a time:
- Warm stubborn adhesive with a hairdryer on low for 20 to 30 seconds to soften it.
- Pull each tab slowly straight down along the wall, keeping the stretch low and steady. If a tab breaks, warm it again and roll the remaining adhesive off gently with your fingertip.
- For residue, rub with a soft cloth dampened with warm soapy water, then dry. Avoid abrasive pads, which damage paint faster than any adhesive.
- Do a final walk-through in daylight, looking along the wall at an angle — raking light reveals marks that head-on viewing hides. Touch up only if your lease expects it; most of the time there will be nothing to fix.
7 Mistakes That Cost Renters Their Security Deposit
- Skipping the alcohol wipe. Dust and cleaner film are the number one reason strips fail — and a fallen frame damages walls far more than any adhesive.
- Overloading past the weight rating. Ratings assume ideal conditions. Stay comfortably under the limit, especially for anything above furniture.
- Using standard strips on textured walls or brick. Adhesives need smooth contact; on rough surfaces they grip only the high points and let go.
- Hanging adhesive-mounted art in steamy bathrooms. Humidity degrades the bond over weeks. Use humidity-rated products or keep art in drier rooms.
- Ripping tabs off fast at move-out. A slow, low-angle pull releases cleanly; a yank takes paint with it.
- Waiting until move-out day. Remove everything a few days early so you have time to clean any residue calmly instead of panicking.
- Forgetting the rest of the apartment. Deposit recovery is a whole-home job — while you are at it, learn to remove hard water stains from glass shower doors, keep your bathroom mirror from fogging up after a shower, and handle other renter-friendly fixes like how to unclog a drain without a plunger or snake.
Frequently Asked Questions
Will adhesive strips damage my paint when removed?
When used on clean, smooth, fully cured paint and removed with the slow stretch-down technique, quality adhesive strips remove cleanly. The risk rises on fresh paint (under a few weeks old), flat-finish paint, or wallpaper — test in a hidden spot first.
How long do adhesive strips last on the wall?
Most manufacturers rate them for years indoors under normal conditions. In practice, check heavy pieces once or twice a year, and be cautious in rooms with big temperature swings or humidity, which shorten adhesive life.
Can I hang a heavy mirror without nails?
Small, light mirrors work on large strip sets or heavy-duty hooks. For anything heavy with glass, adhesives are the wrong tool — have a conversation with your landlord about one properly anchored hook instead of risking a dangerous fall.
Which walls do adhesive strips not work on?
Heavily textured walls, raw brick, concrete, wallpaper, and dusty or flaking surfaces. They also struggle on fresh paint that has not fully cured. Smooth, painted drywall is the ideal surface.
Can adhesive strips be reused?
The interlocking faces can sometimes be repositioned during initial installation, but once removed from the wall the adhesive side is spent. Plan on fresh strips for each new placement — they are inexpensive compared with a lost deposit.
Do I need my landlord’s permission for adhesive hooks?
Most leases restrict holes, nails, and permanent alterations rather than removable adhesives, so permission is rarely required — but reading your specific lease takes five minutes and removes all doubt.










1 thought on “How to Hang Pictures Without Nails in an Apartment Rental”
Comments are closed.