
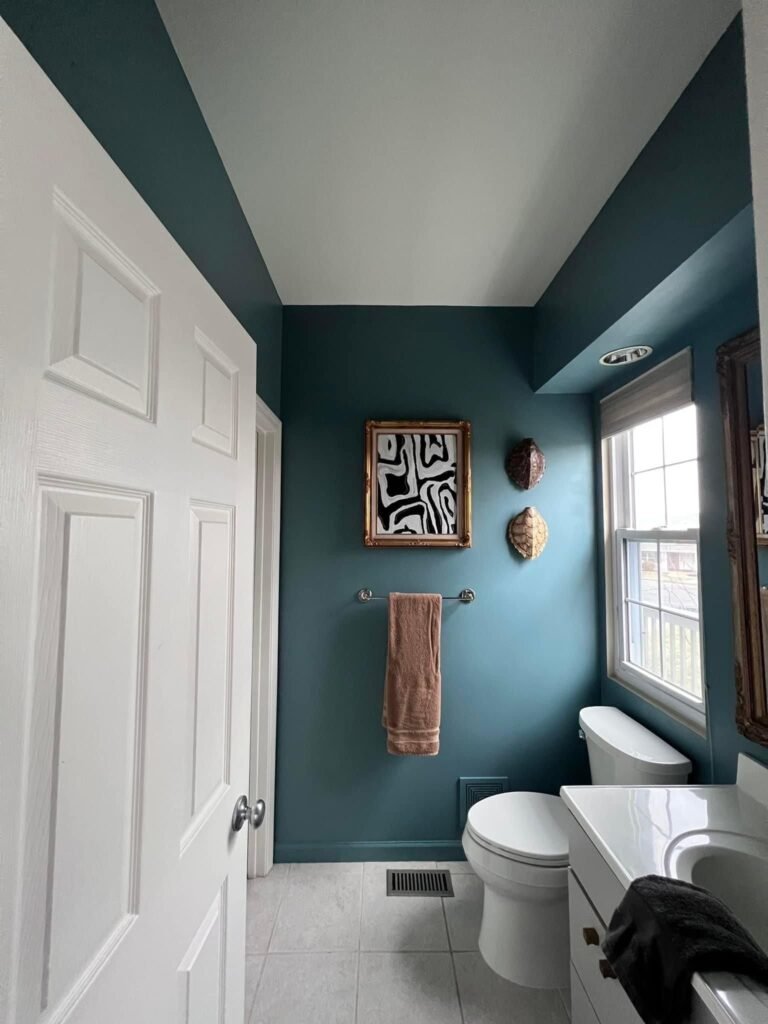
Learning how to paint a small bathroom without removing the toilet can save you a full day of plumbing work, a sore back, and the risk of cracking the porcelain. The toilet looks like it blocks every wall behind it, but with the right tools and a few professional tricks, you can get a clean, even finish around — and behind — the tank without ever touching a wrench.
This guide walks you through the exact process: what to buy, how to prep a humid little room, how to reach the wall behind the tank, and the mistakes that make DIY bathroom paint jobs look amateur. Follow it step by step and your bathroom will look like the toilet was never in the way.
Why You Don’t Need to Remove the Toilet
Plumbers and pro painters remove toilets when they are doing a full gut renovation or replacing the flooring, because the toilet base sits on top of the finished floor. For a paint-only refresh, removing the toilet is almost never worth it. Pulling a toilet means shutting off the water, draining the tank and bowl, unbolting it from the flange, scraping off the old wax ring, and — critically — installing a brand-new wax ring before you set it back down. Skip the new wax ring or seat it slightly off and you get a slow leak under the floor that rots the subfloor over months.
Painting around the toilet, by contrast, is a low-risk project. The toilet occupies a small footprint, and everything around it is reachable with a mini roller, an angled brush, and a little patience. The only area that feels impossible — the wall directly behind the tank — has a simple workaround that painters use every day.
What You’ll Need
Gather everything before you start. Mid-project store runs are how paint dries on your brush and edges dry before you can blend them.
Paint and primer
- Bathroom-specific or satin/eggshell interior paint: Bathrooms are humid. Flat paint absorbs moisture and shows every wipe mark. Satin or eggshell finishes resist moisture and can be wiped clean. Many paint brands sell lines labeled for kitchens and baths with extra mildew resistance.
- Stain-blocking primer: Essential if you are covering a dark color, water stains, or glossy old paint. One coat of primer prevents the old color from bleeding through.
- One gallon is plenty: A small bathroom (roughly 5 x 8 feet) needs about a quart to a half gallon for two coats on the walls. Buy a gallon anyway — it is cheaper per ounce and covers touch-ups.
Tools
- 2-inch angled sash brush (for cutting in around trim and the toilet)
- Mini hot-dog roller (4-inch) with 3/8-inch nap covers — this is the hero tool for tight spaces
- Standard 9-inch roller and tray for open wall areas
- Painter’s tape (1.5-inch, the blue or green kind)
- Flexible plastic putty knife or an old credit card for tucking tape behind the tank
- Drop cloths or plastic sheeting
- Sandpaper or sanding sponge (120- and 220-grit)
- All-purpose cleaner or TSP substitute, sponge, and rags
- Caulk and a caulk gun (paintable, for trim gaps)
- Step stool
Prep: The Part That Decides Everything
Professional painters will tell you that painting is 20 percent rolling and 80 percent prep. In a small bathroom, prep matters even more because every flaw is visible from two feet away.
1. Clear the room completely
Remove everything: shower curtain and rod, towels, bath mats, trash can, toilet paper holder, pictures, and any freestanding storage. Take the tank lid off the toilet and set it somewhere safe — on a folded towel on the bed works well. A tank lid is heavy porcelain; dropping it on tile is a classic DIY disaster.
2. Clean the walls like you mean it
Bathroom walls collect a film of hairspray, soap residue, and humidity grime that paint will not stick to. Wipe every wall with an all-purpose cleaner or TSP substitute, then rinse with a damp sponge. Pay special attention to the wall behind the toilet and around the vanity, where splatter accumulates. Let the walls dry fully.
3. Tape and protect
Run painter’s tape along the ceiling line, around the window trim, door frame, baseboards, and the vanity edges. Press the tape down firmly with your putty knife — in a steamy bathroom, loose tape lets paint bleed underneath.
Now protect the toilet itself. Drape a plastic drop cloth or an old shower curtain liner over the entire toilet — tank, bowl, and base — and tape it lightly in place. You want to be able to lift a corner to reach behind the tank, so do not tape it down like a drum. Also cover the floor around the toilet base with a drop cloth, and tape the toilet’s water supply line and shutoff valve area.
4. Fill, caulk, and sand
Fill nail holes and small dings with spackle, let it dry, and sand smooth with 220-grit. Caulk the gap between the trim and the wall where it has cracked or pulled away — but do not caulk between the toilet base and the floor if there is an existing gap left intentionally at the back (that gap lets leaks show themselves instead of hiding). Sand glossy existing paint lightly with 120-grit so the primer can grip, then wipe the dust off with a damp cloth.
How to Paint Behind the Toilet Tank (Step by Step)
This is the part everyone worries about. The gap between the tank and the wall is usually 1 to 3 inches — too tight for a normal roller, but entirely workable.
Step 1: Prime the hidden wall first
Load your mini hot-dog roller with primer and reach it down behind the tank. Work from the top down in slow strokes. The roller cover will compress slightly to fit the gap. If the gap is too tight even for the mini roller frame, wrap a paint-loaded rag around the flexible putty knife and slide it behind the tank to dab primer onto the wall. It does not need to be beautiful — it needs to be covered.
Step 2: Cut in around the tank with the angled brush
With the 2-inch angled brush, cut in a border around the visible edges of the tank: along the ceiling line above it, down both sides, and along the top of the baseboard below it. Hold the brush at a low angle and use the narrow edge for control. Wipe any paint that gets on the taped plastic covering the toilet immediately — dried paint on porcelain is annoying to scrape off.
Step 3: Roll the wall behind the tank
Reload the mini roller with paint and roll the wall behind the tank using the same top-down motion. Two thin coats beat one thick coat here; thick paint behind the tank dries slowly and can sag. Feather the edges of this section into the surrounding wall while the paint is still wet so you do not get a visible rectangle of slightly different texture around the toilet.
Step 4: Paint the rest of the walls
Cut in the ceiling line, corners, and trim across the whole room with the angled brush, then roll the open wall sections with the 9-inch roller in overlapping W-patterns. Work in 3-foot sections, always rolling back into the wet edge of the previous section. This is what prevents lap marks.
Step 5: Detail the base of the toilet
Pull the drop cloth back from the toilet base and, with the angled brush, carefully paint the wall strip right down to the floor behind and beside the base. Slide the brush handle horizontally along the floor line — the angled bristles do the work. If a little paint touches the porcelain base, wipe it immediately with a damp rag; paint wipes off porcelain easily while wet.
Choosing the Right Paint for a Bathroom
The paint aisle is overwhelming, so here is the short version. For bathroom walls, choose a satin or eggshell sheen in a quality interior line. These finishes have enough resin to shrug off humidity and allow gentle scrubbing. Semi-gloss is even more moisture-resistant and works well on trim and doors, but on walls it highlights every imperfection — risky in a small room where the light rakes across the surface.
Color choice matters more in a tiny bathroom than anywhere else in the house. Light, cool colors — soft white, pale gray, light blue-green — bounce light around and make the room feel bigger. Dark, moody colors can look stunning in a small powder room with good lighting, but they show every roller mark, so your technique has to be sharp. Whatever color you choose, buy a sample quart and paint a large test square first; bathroom lighting changes colors dramatically.
One more thing: run the bathroom exhaust fan during painting and for several hours after. Good airflow speeds drying and keeps moisture from getting trapped under the fresh paint film, which causes bubbling.
If your bathroom mirror fogs constantly, that same trapped humidity is also working against your paint — see our guide on how to keep a bathroom mirror from fogging up after a shower for ventilation fixes that protect both your mirror and your new paint job.
Common Mistakes to Avoid
- Skipping the cleaning step. Paint over soap film peels within months in a humid bathroom. The walls must be truly clean.
- Using flat paint. It looks velvety on day one and spotty by month six. Bathrooms need a scrubbable sheen.
- One thick coat instead of two thin ones. Thick coats sag behind the tank where you cannot see them dripping, and they take forever to cure in humidity.
- Painting with the fan off and the door closed. You need ventilation for drying and for your lungs.
- Forgetting the tank lid. Paint the wall, admire your work, then chip the fresh paint setting the heavy lid back on. Replace the lid only after the paint is fully dry — ideally the next day.
- Caulking the entire toilet base to the floor. Leave the back uncaulked so a future leak reveals itself instead of rotting the floor silently.
- Pulling tape too late. Remove painter’s tape while the final coat is still slightly tacky, pulling at a 45-degree angle. Waiting until the paint fully cures can peel paint off with the tape.
How Long Does It Take?
For a typical small bathroom, budget one full day: 2 to 3 hours of prep and taping, 2 hours for primer and first coat, and 2 hours for the second coat after the recommended recoat time (usually 2 to 4 hours depending on the paint). You can use the bathroom lightly the same evening, but wait at least 24 hours before hanging things back on the walls or replacing the tank lid, and give the paint a full two weeks to cure before scrubbing it.
While you have the room emptied, it is the perfect moment to tackle the other small bathroom annoyances — like the hard water stains on glass shower doors or a slow drain — before everything goes back in place.
Frequently Asked Questions
Can I really get a good finish behind the toilet without removing it?
Yes. A 4-inch mini roller fits behind most toilet tanks, and for very tight gaps a paint-loaded rag wrapped around a putty knife reaches everywhere. The area behind the tank is barely visible anyway — full coverage matters more than a flawless finish there.
Do I need to turn off the water to the toilet before painting?
No. You are not disconnecting anything. Just avoid banging the supply line and shutoff valve with your roller frame while you work around the base.
What if paint drips on the toilet?
Wipe it immediately with a damp rag — wet latex paint comes right off porcelain. If you find a dried drip later, soften it with a little rubbing alcohol and scrape gently with a plastic scraper, never a razor blade, which can scratch the glaze.
Should I paint the ceiling too?
If the ceiling is stained, yellowing, or a different color, yes — use a ceiling paint or the same satin paint. Bathrooms generate steam that rises straight to the ceiling, so a moisture-resistant finish there pays off.
How do I keep paint from getting on the toilet tank bolts and supply line?
Wrap the supply line, shutoff valve, and any visible bolts with small strips of painter’s tape before you start. It takes two minutes and saves fiddly cleanup.
Is one coat of paint enough in a bathroom?
Almost never. Two thin coats give you the film thickness the paint needs to resist moisture. One coat looks fine on day one but wears through quickly in a humid room.











2 thoughts on “How to Paint a Small Bathroom Without Removing the Toilet”
Comments are closed.