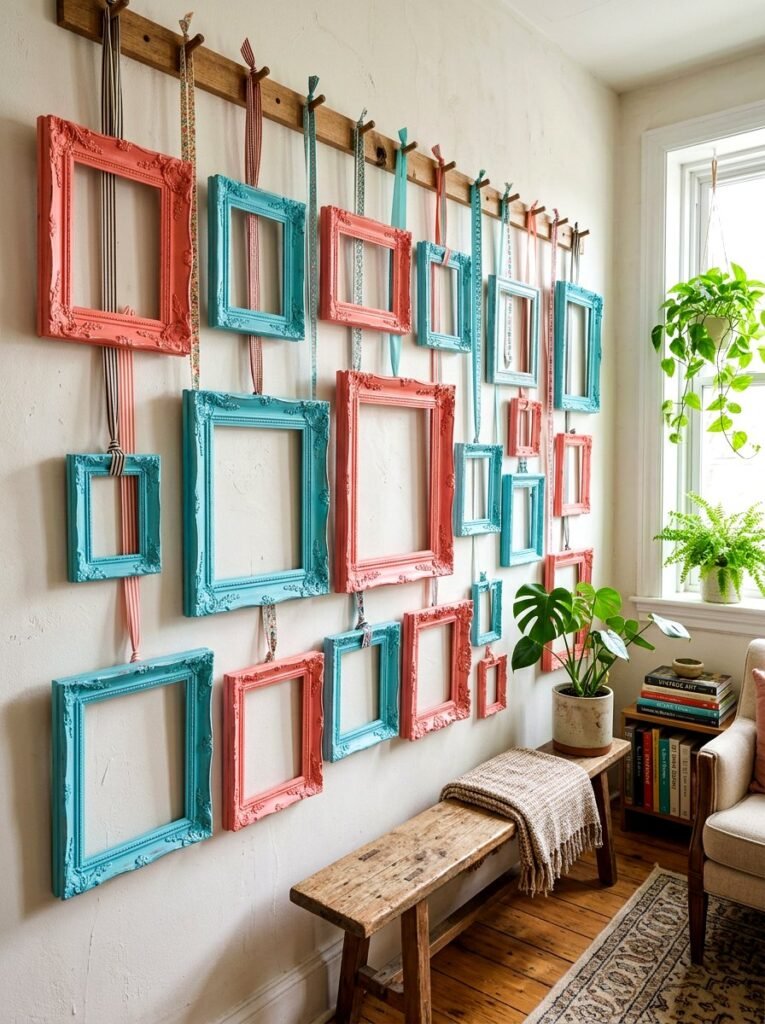
A gallery wall can turn a blank stretch of drywall into the most interesting part of your home, but the thought of getting every frame perfectly straight stops a lot of people cold. Most tutorials assume you own a spirit level, a laser level, or at least a sturdy step ladder and a full toolbox. If you are learning how to hang a gallery wall without a level, you need a different playbook: one built on painter’s tape, paper templates, clever sight lines, and a few household stand-ins that do the job just as well.
The good news is that professional-looking results come from planning and patience, not from expensive tools. Below is a complete, beginner-friendly method for hanging a gallery wall evenly without a level, including how to lay out the arrangement, mark the wall with confidence, and fix the small crooked frames that drive everyone crazy.
What You Will Need (No Level Required)
You do not need a hardware store run to pull this off. Gather these items before you start:
- Painter’s tape (the blue or green kind that peels off cleanly)
- Kraft paper, wrapping paper, or newspaper for making frame templates
- A pencil and scissors
- A tape measure or ruler (a phone measuring app works in a pinch)
- A smartphone with a free bubble-level app installed
- Nails, hooks, or picture-hanging strips appropriate for your wall type
- A small hammer
- A credit card or index card (doubles as a straight edge and a spacing guide)
If you are renting, consider adhesive picture-hanging strips instead of nails. Our guide on how to hang pictures without nails in an apartment rental walks through damage-free options that pair perfectly with the layout method below.
Step 1: Gather and Prep Your Frames
Start by collecting every frame you want on the wall and laying them face-down on a large table or the floor. Remove anything you are unsure about; a gallery wall looks better with eight confident choices than twelve hesitant ones. Wipe the glass clean, since you will be handling everything anyway, and take a quick photo of the group for reference.
Check the hardware on the back of each frame. Wire hangers are the most forgiving for beginners because they let you nudge a frame left or right on a single nail. Sawtooth hangers are fine too, but they demand more precise placement. If any frame is missing hardware, install adhesive sawtooth hangers or D-rings now, before you start laying anything out.
Step 2: Plan the Layout on the Floor First
This is the single most important step, and it is where most crooked gallery walls go wrong. Never start hammering without a full dry run.
- Clear a floor space roughly the same size as your wall area, or lay down a bedsheet to define the boundaries.
- Place your anchor piece first. The anchor is your largest or boldest frame. Put it near the center of the arrangement, at roughly eye level (the center of the whole group should sit about 57 to 60 inches from the floor once it is on the wall).
- Build outward from the anchor. Add frames one at a time, keeping a consistent gap between them. Two to three inches of spacing works for most arrangements; tighter spacing feels cohesive, wider spacing feels airy.
- Balance visual weight, not just size. A small dark frame carries as much visual weight as a larger light one. Distribute dark, bold pieces so they do not all cluster on one side.
- Mix orientations. A combination of horizontal and vertical frames almost always looks more dynamic than all one direction.
- Step back and squint. From six to eight feet away, squint slightly so the details blur. Imbalances in spacing and weight become obvious immediately. Rearrange until the blurred version looks even.
Step 3: Make Paper Templates of Every Frame
Trace each frame onto kraft paper or newspaper and cut out the shape. Write a number on each template that matches a numbered frame, so nothing gets mixed up. These templates are your stand-in for the frames while you plan the wall, and they save you from holding heavy frames up repeatedly.
If your frames have wire hangers, also mark the template: measure from the top of the frame down to where the wire sits at its highest point when pulled taut, and mark that spot on the template. This tells you exactly where the nail needs to go relative to the top of the frame. For sawtooth hangers, mark the exact center of the teeth.
Step 4: Create a Painter’s Tape Grid on the Wall
Here is the core trick for hanging a gallery wall evenly without a level. Instead of a bubble level, you build a temporary grid of painter’s tape that gives you straight horizontal and vertical reference lines.
Find your horizontal reference line
Start by establishing the center height of the arrangement, typically 57 to 60 inches from the floor. Run a long horizontal strip of painter’s tape across the wall at that height. It does not have to be perfectly level by itself yet; you will verify it in the next step.
Check levelness by eye with room sight lines
This is how you confirm your tape line is straight without a level. Stand six to eight feet back and crouch slightly so your eyes are at the tape’s height. Compare the tape to the horizontal features already in your room: baseboards, window sills, the top of a doorframe, ceiling lines, or the back of a sofa. Our eyes are surprisingly good at judging parallel lines. Adjust the tape until it runs parallel to those features, then press it down firmly.
Two more household checks work well:
- The smartphone bubble level app. Set your phone on top of a hardcover book or a yardstick held against the tape line, and read the app. It is remarkably accurate and completely free.
- The water-fill trick. Fill a clear plastic bottle nearly to the top with water and set it on a book at the tape line. The water surface is a true horizontal. If the book looks tilted against your tape, adjust.
Add vertical guides
Once the horizontal line is set, add a couple of short vertical tape strips at the left and right edges of your planned arrangement. Check these against doorframes or window edges the same way. You now have a grid that keeps every frame aligned, no level required.
Step 5: Tape the Templates to the Wall
Starting with the anchor template, tape each paper cutout to the wall inside your grid, using the floor layout as your map. Use small loops of painter’s tape on the back of each template so you can peel and reposition them easily.
Live with the template wall for at least a few hours, ideally overnight. You will notice things at different times of day and from different angles that you missed during the first pass. Adjust spacing, swap two frames’ positions, or drop a piece that suddenly feels wrong. This is the beauty of templates: every change costs you nothing.
Step 6: Mark Nail Positions Through the Templates
Once the template arrangement is final, it is time to mark where the nails go. For each template:
- Find the nail mark you made on the template (the wire-pull point or sawtooth center).
- Push a pencil firmly through the paper at that mark to dot the wall behind it, or drive the nail straight through the paper and pull the template away afterward.
- Remove the template and confirm the pencil dot is visible.
Driving the nail through the template is the more foolproof option, since there is no measuring or transferring involved. Just be sure the nail goes in at a slight upward angle, which gives it better holding strength.
Step 7: Hang the Frames and Do the Final Eye Check
Hang each frame on its nail, starting with the anchor and working outward. For frames on wires, slide the frame left or right on the nail until the sides look parallel to your tape grid’s vertical lines. Step back after every two or three frames to check the whole composition, not just the piece you just hung.
For the final check, use the squint test again, plus the phone camera test: take a photo of the wall from straight on and look at it on your phone screen. A photo flattens perspective and makes crooked frames jump out in a way your eyes might miss in person. Nudge any frame that looks off. Remove the tape grid last, pulling slowly at a downward angle so it does not take paint with it.
Common Gallery Wall Mistakes to Avoid
- Hanging everything too high. The center of the arrangement should be at eye level, around 57 to 60 inches from the floor. Most beginners hang art too high.
- Inconsistent spacing. Pick one gap size and stick with it. A credit card’s width or a closed fist makes a handy reusable spacer.
- Ignoring the furniture below. If the wall is above a sofa or console table, leave six to eight inches between the furniture top and the bottom of the lowest frame so the two feel connected.
- Using only small frames on a big wall. The arrangement should fill roughly two-thirds of the wall width above furniture. If your frames are small, add more of them or include one large anchor piece.
- Skipping the overnight test. Templates cost nothing to move; nail holes do not. Always live with the layout for a day before committing.
Tips for Special Situations
Gallery walls on staircases
Staircase walls are the one place where the floor-layout method needs an adjustment. Instead of one horizontal grid line, run your painter’s tape parallel to the slope of the stairs, keeping the bottom edge of the arrangement a consistent distance above each step. Templates are even more valuable here because the angled wall makes everything harder to judge.
Very heavy frames
For frames over about 20 pounds, skip single nails and use two hooks spaced a few inches apart, or wall anchors rated for the weight. Mark both positions on the template. Two points of contact also keep heavy frames from drifting crooked over time.
Rental-friendly versions
Adhesive hanging strips work with the exact same template method. Instead of marking nail points, mark the strip positions on the template, stick the strips to the wall through the template’s guide marks, and press the frame on. When you move out, the strips remove cleanly.
Frequently Asked Questions
Can you really hang pictures straight without a level?
Yes. A level is convenient, but straight lines can be judged by comparing against the room’s existing horizontal features (baseboards, doorframes, window sills), by using a free bubble-level phone app, or by building a painter’s tape grid and checking it with the squint test. Professionals use these same sight-line tricks even when they own levels.
How far apart should gallery wall frames be?
Two to three inches of gap between frames works for most arrangements. Smaller gaps feel intentional and cohesive; larger gaps of four to five inches can work for very large walls but risk looking scattered. Whatever you choose, keep it consistent across the whole wall.
What is the best height for a gallery wall?
The center of the entire arrangement should sit about 57 to 60 inches from the floor, which matches average eye level. Above a sofa or console table, leave six to eight inches between the top of the furniture and the bottom of the lowest frame.
How do you hang a gallery wall without making too many nail holes?
Use the paper template method described above so every nail position is decided before you touch a hammer. Driving nails through the templates means one hole per frame, in exactly the right spot. For a no-holes option, adhesive picture-hanging strips use the same template workflow.
Should gallery wall frames all match?
They do not have to. Matching frames give a clean, formal look, while mixed frames feel eclectic and personal. If you mix, repeat at least one element (frame color, mat color, or subject theme) so the collection feels unified rather than random.
What do you do if one frame keeps sliding crooked?
Frames on single nails can drift, especially with wire hangers. Fix it by adding a small adhesive bumper pad to the bottom back corners of the frame, which grips the wall and holds the frame in place. For heavy pieces, switch to two hooks instead of one.