If your cabinet doors feel sticky, look dull, or show a yellowish film near the stove, you are dealing with one of the most common kitchen cleaning problems. Learning how to remove grease from kitchen cabinets without harsh chemicals is worth the effort, because strong sprays can strip finishes, dull paint, dry out wood, and leave a smell that lingers long after you finish cleaning. The good news is that kitchen grease, even when it has built up over a long stretch, usually responds well to gentle methods. Warm water, mild dish soap, baking soda paste, and plain white vinegar, used in the right order and with the right touch, can lift most grease without damaging the surface underneath. This guide walks through the full process, from testing a cleaner safely to tackling stubborn spots and keeping cabinets clean afterward, so you can restore a fresh look without reaching for aggressive products.
Why Grease Builds Up on Cabinets
Cooking releases tiny droplets of oil into the air. Every time you fry, saute, roast, or simmer a dish with oil, a fine mist rises from the pan and settles on nearby surfaces. Cabinets above and beside the stove catch the most, but grease also travels further than many people expect, carried by steam and warm air across the kitchen. Over time, those thin layers stack up, trap dust and cooking particles, and turn into the tacky coating you feel when you open a door. Handles and edges collect even more, because hands transfer skin oils and food residue with every touch. The range hood area, the top edges of upper cabinets, and the doors closest to the cooktop are usually worst affected, and they are also the places most often missed during a quick wipe-down. Grease is a normal side effect of cooking at home, not a sign of neglect, and even a tidy kitchen will develop a film if cabinets are only wiped occasionally.
What You Need for Gentle Cleaning
You do not need a shelf full of specialty products. A small set of mild supplies handles nearly every cabinet cleaning job: gentle dish soap, baking soda for a mild abrasive paste, white vinegar for light film, and soft microfiber cloths that will not scratch finishes. A soft-bristle brush, such as an old toothbrush, helps around handles, hinges, and carved details. Keep a spray bottle, a bowl, warm water, and a dry towel nearby. Avoid steel wool, scouring pads, stiff brushes, and gritty powdered cleansers, because they can leave fine scratches that trap even more grease later. The same caution applies to magic erasers, which are mildly abrasive and can dull paint if pressed hard. When in doubt, choose the softest cloth and the mildest cleaner first, and step up only if the grease remains after a fair attempt.
Safety First: Test in a Hidden Spot and Never Mix Cleaners
Before you clean a full cabinet door, test any cleaner in a hidden spot first. Pick an inside edge, the back of a door, or a lower corner that is rarely seen, apply a small amount of your chosen solution, wait a few minutes, then wipe and dry it. Check for changes in color, shine, texture, or softness. If the test spot looks unchanged, the cleaner is likely safe for the rest of that cabinet. This step matters most for painted cabinets, stained wood, and older finishes, which can react differently even to mild products. It takes only a few minutes and can prevent a visible patch of damage on the most prominent door in the kitchen. Never mix cleaners, especially never combine vinegar with baking soda in a closed container, bleach with vinegar, or bleach with any ammonia-based product. Mixing can create fumes, reduce cleaning power, or damage surfaces, and it never makes a cleaner stronger in a useful way. Use one cleaner at a time, rinse between different products, and work in a ventilated kitchen by opening a window or running the range hood fan. Wear gloves if you have sensitive skin, and keep cleaning solutions away from food, dishes, and open containers while you work.
The Basic Method, Step by Step
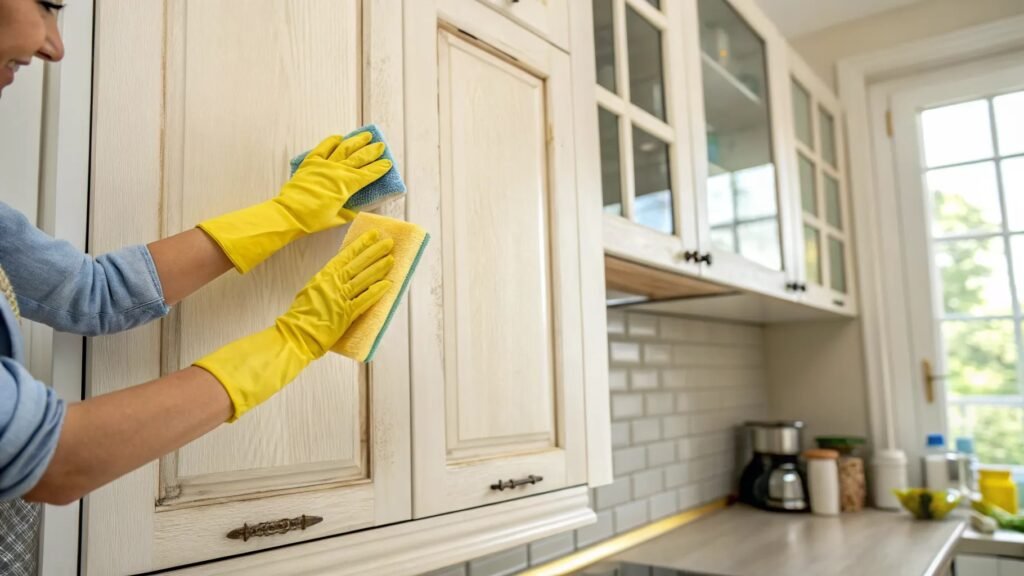
Start by emptying the area you plan to clean and removing loose dust. Wipe each cabinet door with a dry microfiber cloth to pick up crumbs and surface dust, because scrubbing gritty dust into a greasy surface can scratch it. Next, mix a gentle cleaning solution: a few drops of mild dish soap in a bowl of warm water. Dip a soft cloth into the solution, wring it out well so it is damp rather than dripping, and wipe the cabinet in the direction of the wood grain when grain is visible. Work one door or one section at a time, rather than wetting the whole kitchen at once, so no surface stays damp for long. For light grease, this soapy wipe alone is often enough. Rinse the cloth in clean warm water, wring it out, and wipe the same section again to remove soap residue. Soap left behind can attract dust and leave a hazy film, so the rinse wipe is not optional. Dry the surface immediately with a clean towel or a dry microfiber cloth. Drying matters because standing water can seep into seams, swell wood edges, and leave marks on paint. Repeat the wash, rinse, and dry steps on each door, changing your rinse water when it becomes cloudy. When you finish, step back and look at the cabinets in natural light or under the kitchen lights, because grease that is invisible in dim light often shows up clearly under bright light.
Dealing With Sticky or Thick Grease
When a soapy wipe leaves a sticky feeling behind, move to a baking soda paste. Mix baking soda with just enough warm water to form a thick, spreadable paste, similar in texture to toothpaste. Spread a thin layer over the greasy area with your fingers or a soft cloth, and let it sit for five to ten minutes. Baking soda is mildly abrasive and mildly alkaline, which helps it lift grease without the harshness of a chemical degreaser. After the wait, rub gently in small circles with a damp soft cloth, following the grain on wood surfaces. Wipe away the paste with a clean damp cloth, rinse again, and dry thoroughly. For very stubborn patches, repeat the paste step rather than scrubbing harder. Patience protects the finish, while force removes it. If the paste still does not lift the grease, a diluted vinegar wipe can help on many hard surfaces, but use it cautiously on stone-adjacent trim and always test first, since vinegar is acidic and can affect some finishes with repeated use. On most sealed wood and laminate cabinets, a brief vinegar wipe followed by a prompt rinse is safe, but it should not be your first choice for delicate or unsealed wood.
Cleaning Around Handles, Hinges, and Details
Handles, knobs, hinges, and carved panels collect grease in corners that a flat cloth cannot reach. Use a soft toothbrush dipped in your soapy solution to work gently around hardware and into grooves. Remove knobs and pulls when possible, because cleaning underneath them reveals a ring of trapped grease and lets you wash the hardware separately in warm soapy water. Dry hardware fully before reinstalling it, since trapped moisture can stain wood or tarnish metal over time. For hinges, wipe the visible surfaces and use the brush only on the outer parts, avoiding forcing water into the hinge mechanism. Carved or routed details need a light touch: let the cleaning solution sit briefly to soften grease, then brush lightly and wipe clean. If a detail still looks dark after cleaning, it may be shadow or natural wood variation rather than dirt, so avoid aggressive scrubbing in pursuit of a uniform color that was never there. Taking hardware off also gives you a chance to tighten loose screws, which is a small bonus that makes cabinets feel sturdier when the job is done.
Methods by Cabinet Type
Different cabinet materials respond differently, so adjust your approach to the surface in front of you. Sealed wood cabinets usually handle dish soap and baking soda paste well, provided you never soak them and always dry promptly. Wipe with the grain, avoid excess water near joints, and skip vinegar unless a test spot confirms it is safe. Painted cabinets need extra care, because paint can soften or dull under strong cleaners and hard scrubbing, so stick to mild soap and water with the lightest pressure that works. Laminate and thermofoil cabinets resist moisture better, but they can peel or bubble if water seeps under an edge, so keep cloths damp rather than wet and never use steam directly on a seam. For glass-front cabinets, clean the frame by its material and buff the glass dry to avoid streaks. Do not forget the tops of upper cabinets, where grease and dust settle out of sight.
What Not to Do
Several common shortcuts cause more harm than the grease itself. Do not spray an all-purpose degreaser directly onto a cabinet and leave it to soak, because concentrated products can discolor paint, soften finishes, and seep into seams. Do not use undiluted vinegar, lemon juice, or essential oil blends on wood without testing, since acids and oils can alter a finish or leave a residue that attracts dust. Never use oven cleaner, bleach, or abrasive powders on cabinets, even on a stubborn spot, because the damage is often permanent. Do not scrub with a rough pad, since scratches show clearly once light hits the surface, and do not drench cabinets with a dripping cloth, because excess water harms wood joints and painted edges. Grease returns with normal cooking, so a gentle routine beats an occasional aggressive attack every time.
Keeping Cabinets Grease-Free After Cleaning
Once cabinets are clean, a light routine keeps them that way with far less effort than another deep clean. Wipe the doors nearest the stove with a damp cloth and a drop of dish soap after heavy cooking sessions, especially after frying or roasting, when grease output is highest. This quick wipe takes a minute and prevents the film from hardening. Run the range hood fan whenever you cook, and clean or replace its filter regularly, because a clogged filter lets more grease escape into the room. Keeping contents tidy inside also helps, since spills and drips from stored bottles add to the mess, and a practical guide to organizing a small pantry without buying expensive containers can offer useful ideas for keeping shelves neat, at Organize a Small Pantry Without Buying Expensive Containers. Wipe handles regularly, since they are touched most often and show grease first, and give all doors a full gentle clean on a regular cycle so buildup never reaches the sticky stage again.
When Gentle Methods Are Not Enough
Most grease yields to soap, baking soda, and patience, but a failed finish is a different problem. If paint is already peeling, bubbling, or cracked, cleaning may reveal damage hidden under the grease, and no gentle cleaner will restore it. Stop scrubbing, let the surface dry, and consider a repainting or refinishing project, or a professional opinion. Grease soaked into unsealed or damaged wood also cannot be fully removed by surface cleaning, and repeated wetting may make the wood worse. Knowing when to stop protects you from turning a cleaning job into a repair job.
FAQs
Can dish soap alone remove cabinet grease?
Yes, for light to moderate grease, warm water with a few drops of mild dish soap is often enough. Dish soap is designed to break down cooking oils, and a damp cloth, a rinse wipe, and prompt drying will restore most cabinets. Baking soda paste is the next step only when soap leaves a sticky residue behind.
Is vinegar safe for wood cabinets?
Vinegar can be used cautiously on sealed wood and laminate, but it is acidic, so always test it in a hidden spot first and rinse promptly. Avoid vinegar on unsealed wood, waxed finishes, or surfaces where the finish is already worn, and never rely on it as a daily cleaner for wood.
How do I clean grease from painted cabinets without damaging the paint?
Use the mildest method first: warm soapy water, a soft microfiber cloth, and light pressure. Test baking soda paste in a hidden spot before wider use, avoid abrasive pads, and dry each door right away. If paint softens or color transfers to your cloth, stop and switch to plain warm water with the smallest amount of soap.
What causes the sticky feeling on cabinet doors near the stove?
Cooking oil mist settles on surfaces near the cooktop and traps dust, forming a tacky layer that hardens over time. Handles add skin oils and food residue. Regular light wiping of stove-adjacent doors prevents that layer from building into a stubborn coating.
Should I remove cabinet hardware before cleaning?
Removing knobs and pulls when possible gives a better result, because grease hides underneath them and hardware itself needs washing. Dry all hardware fully before reinstalling, and tighten loose screws while the hardware is off for a sturdier feel.
How often should kitchen cabinets be cleaned?
It depends on how much you cook with oil. A quick wipe of stove-adjacent doors after heavy cooking, a light clean of all doors on a regular cycle, and a deeper gentle clean every couple of months keeps most kitchens in good shape without letting grease harden.