Learning to ride a bicycle is one of childhood’s biggest milestones, and most parents approach it with a mix of excitement and nerves. If you’re wondering how to teach your child to ride a bike without training wheels, you’re already on the right track. The modern approach skips training wheels entirely and uses a balance-first method that helps kids feel confident, safe, and genuinely in control — often in just a few short practice sessions. This guide walks you through everything from choosing the right bike to handling tears, so you can make the whole experience a happy memory instead of a stressful one.
Why Skip Training Wheels?
For decades, training wheels were the default first step for new riders. The problem is that they teach a child to rely on the extra wheels for balance rather than learning to balance themselves. A child on training wheels is essentially riding a tricycle: the bike stays upright no matter what, so the rider never develops the instinct to lean, shift weight, and correct. When the training wheels finally come off, it feels like starting over from zero.
The balance-first method flips the order: teach balancing first, then add pedaling. Kids who learn this way typically start riding independently faster, fall less, and gain real confidence on two wheels.
Balance Bike vs. Training Wheels
- Balance bikes: These are pedal-less bikes designed for toddlers and preschoolers. The child pushes along with their feet, naturally learning to glide and steer. Graduating to a pedal bike later is almost effortless.
- Training wheels: Cheap and familiar, but they create a false sense of security and can actually delay real riding skills. They also tip on uneven surfaces, which causes unnecessary scares.
- Converting a pedal bike: You can get the benefits of a balance bike for free by simply removing the pedals from a regular bike and lowering the seat — more on that below.
What You Need Before You Start
The Right Bike Size
Bike size matters more than anything else. A bike that is too big is scary; a bike that is too small is awkward. The golden rule: your child must be able to place both feet flat on the ground while sitting on the saddle. Skip measuring wheel sizes alone and do the sit test instead.
- Lower the seat as far as it needs to go — being able to touch the ground comfortably is the priority, not looking tall.
- The handlebars should be within easy reach with a slight bend in the elbows.
- Avoid heavy steel bikes; lightweight aluminum frames are much easier for kids to control and pick up after a fall.
Helmet and Safety Gear
A properly fitted helmet is non-negotiable. It should sit level on the head, not tilt back, and the strap should be snug enough that only one finger fits between the strap and the chin. Knee and elbow pads are optional but smart for very nervous kids — knowing they are protected can be the difference between “I’m scared” and “let’s try again.” Closed-toe shoes with grippy soles help the child push and brake with their feet confidently.
The Perfect Practice Location
- A large, flat, smooth surface — an empty parking lot, a quiet cul-de-sac, or a paved park path works best.
- A gentle, very slight grassy slope can help a child learn to glide, but avoid real hills until steering is solid.
- No traffic, no crowds, no dogs off leash. Distractions make kids tense.
- Go early in the morning or on weekdays when open spaces are empty.
The Balance-First Method: Step by Step
Step 1: Turn the Bike Into a Balance Bike
Lower the saddle so your child’s feet rest flat on the ground, and remove the pedals with a wrench (most pedals unscrew in a couple of minutes — keep them in a labeled bag so you don’t lose the washers). Without pedals, the bike becomes a glider. Let your child walk, then scoot along with the bike between their legs. There’s no pressure to “ride” yet — they’re just getting comfortable with the bike’s weight and steering.
Step 2: Gliding
Have your child push off with both feet and lift them slightly off the ground to coast. Start with short glides of a few feet, then longer ones. The goal is for them to coast for 10 to 15 seconds with feet up before you even think about pedals. You’ll know they’re ready when they can glide in a straight line and make gentle turns while coasting. This is the single most important phase — don’t rush it. Gliding is what builds real balance, and it usually takes one to three sessions.
Step 3: How to Hold the Bike at the Start
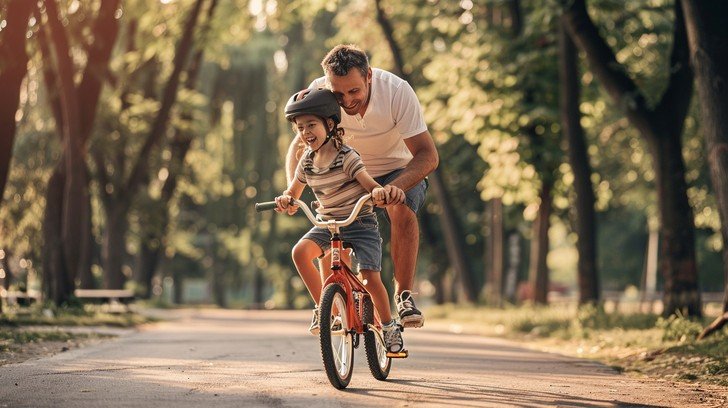
At first, your child may want a hand on them — that’s fine, but hold them right: place one hand lightly on their back or the back of their shirt, not on the bike. Holding the seat or handlebars does the balancing for them and teaches nothing. Better yet, stand slightly behind them so they can’t lean on you. Your real job is to be there for a catch, not to steer. The moment they can glide without your hand, let go and jog alongside instead.
Step 4: Add the Pedals Back
Once gliding is comfortable, reattach the pedals and raise the seat slightly — feet should still touch the ground but may be on tiptoes now. Set the pedals with one crank at the 2 o’clock position so the child can push down from a strong starting position. Let them glide first, then find the pedals with their feet while moving. The first few pedal strokes will be wobbly; have them return to gliding whenever they feel unsteady. Most kids connect pedaling to balance within a single session.
Step 5: Starting and Stopping on Their Own
Teach starts explicitly: put the stronger foot on the raised pedal, push down, and glide into motion. For stopping, practice braking before you need it. If the bike has hand brakes, practice squeezing them while walking the bike first. If it has a coaster (back-pedal) brake, practice stopping from a slow glide many times. Also teach the emergency stop: feet down, squeeze brakes, look where you’re going. Run stopping drills until stopping feels automatic — kids who can stop confidently ride confidently.
Teaching Braking and Steering
Braking deserves its own practice time. Set up a “stop line” with chalk or a stick and have your child practice braking to stop exactly at it, starting from a slow glide and building up speed. Turn it into a game — “Can you stop before the red line?” — and they’ll drill it happily.
For steering, set up simple slalom courses with cones, chalk marks, or water bottles. Big, lazy S-turns teach weight shifting; tighter turns come later. Remind them to look where they want to go, not down at the front wheel — where the eyes go, the bike follows.
How Long Should Practice Sessions Be?
Short and fun beats long and exhausting. Aim for 20 to 30 minutes per session, ending on a high note even if the goal wasn’t reached. Two short sessions in a day (morning and evening) work better than one long one. If your child is tired, frustrated, or hungry, stop — pushing through builds negative associations that can stall progress for weeks. Most kids go from first glide to independent riding in three to seven sessions spread over one to three weeks. There’s no deadline; let the child’s readiness set the pace.
Dealing With Fear, Tears, and Frustration
Some kids take to gliding immediately; others freeze up at the sight of a bike. Both are normal. Here’s how to handle the hard moments:
- Never shame or rush. “Come on, it’s easy” invalidates their feelings and raises the pressure. Try “It’s okay to feel wobbly — that’s your body learning.”
- Let them watch other kids. Seeing a slightly older child glide and pedal is the most motivating thing in the world.
- Give them control. Let them choose when to stop, where to practice, even what color helmet they wear. Autonomy reduces fear.
- Celebrate tiny wins. The first 5-foot glide is huge. Cheer like it is.
- Take a break, not a defeat. A few days off won’t erase progress. Sometimes skills consolidate during the break, and they come back better.
Bike riding also counts as the kind of active, screen-free play that keeps kids healthy and curious. If cutting back on passive screen time is part of your family’s goal, learning to ride together is a perfect trade — you can read more ideas in this related piece: How to Get Kids Off Screens Without Taking Devices Away.
What If Your Child Is Older or Extra Scared?
Starting at seven, eight, or older is absolutely fine — older kids actually learn the mechanics faster because their coordination is better developed. The barrier is usually social: they feel embarrassed that they can’t ride yet. Keep practice private and low-key, and frame it as a fun project rather than a milestone they “should” have hit. For deeply fearful kids, extend the gliding phase as long as needed; there’s no rule that pedals must go on this week. Some kids benefit from practicing on grass first (softer falls, slightly slower), even though it’s harder to glide on.
Mistakes to Avoid
- Holding the seat too long. The classic parent error. If you’re doing the balancing, your child isn’t learning it. Support the child, not the bike — and let go earlier than feels comfortable.
- Teaching on hills. A slope adds speed before the child has control. Start flat; add gentle gradients only after braking and steering are solid.
- Pushing too hard. Running alongside shouting “pedal, pedal, pedal!” creates panic, not learning. Calm, quiet coaching works better.
- Wrong bike size. A bike your child will “grow into” is a bike they can’t control. Fit the child to today’s bike.
- Skipping the helmet. Every ride, every time, no exceptions. It also models the habit.
- Practicing in the street. Driveways that meet roads, sidewalks with pedestrians, and anywhere with cars nearby add danger and distraction. Find an open space.
- Letting frustration end the day. Always finish practice with something your child can already do well, so the session ends with a win.
Frequently Asked Questions
What age is best to start learning without training wheels?
Most children are ready between ages 3 and 6 for the balance-first method, since that’s when leg strength and coordination come together. But there is no wrong age — older children and even adults learn the same way. Readiness signs matter more than age: can they walk and run steadily, follow simple instructions, and reach the ground from the saddle?
How long does it usually take a child to learn?
With the gliding method, most kids are riding independently within three to seven short sessions over one to three weeks. Some confident kids do it in a single afternoon; nervous kids may need a month. Both timelines are completely normal.
Should I remove the pedals, or just buy a balance bike?
Either works. A dedicated balance bike is ideal for toddlers because it’s lighter, but removing the pedals from a regular bike achieves the same thing for free and lets the child transition to pedals on a bike they’re already comfortable with.
Is it better to learn on grass or pavement?
Pavement is better for learning to glide because the bike rolls smoothly and the child gets clear feedback on balance. Grass is softer for falls but harder to coast on, which can frustrate beginners. Use pavement with safety gear, and use grass only if fear of falling is the main blocker.
Why does my child keep turning the handlebars too sharply?
New riders oversteer because they’re looking down at the front wheel instead of ahead. Remind them to look where they want to go, and set up wide, gentle slalom turns so they learn that small steering inputs are enough.
My child can glide but is scared to pedal. What should I do?
Don’t force it — extend the gliding phase and make pedaling optional. Try having them rest one foot on a pedal while gliding with the other foot pushing, then switch. Once they feel how the pedals support forward motion, fear usually fades on its own within a session or two.