Learning how to caulk a bathtub without a caulking gun is one of the most satisfying small home repairs you can tackle in a single afternoon. That crumbling, moldy bead of sealant around the edge of your tub is not just ugly — it lets water seep behind the tub and into the wall, where it can rot framing, feed mold, and turn a ten-dollar fix into a multi-thousand-dollar repair. The good news is you do not need to buy or borrow a caulking gun to get a clean, professional-looking result. A simple squeeze tube of caulk, a bit of prep work, and a few smoothing tricks are all it takes to lay down a watertight seal that looks like a pro did it.
This guide walks you through the entire process, from picking the right product to cutting the tip, laying the bead, and smoothing it by hand. No specialty tools, no experience required.
Why Re-Caulk Your Bathtub in the First Place
Caulk is the flexible, waterproof seal that fills the gap between the edge of your bathtub and the surrounding wall or tile. Over time, constant exposure to water, heat, cleaning chemicals, and the slight movement of the tub itself breaks that seal down. Here are the signs your tub is due for fresh caulk:
- Visible cracks or gaps in the existing bead, where you can see a dark line or opening.
- Peeling or curling edges that pull away from the tub or the wall.
- Persistent black or pink discoloration that does not come off with cleaning — that is mold living inside the caulk, not on it.
- Soft or crumbly texture when you press it with your fingernail; good caulk feels firm and rubbery.
- Water stains on the ceiling below the bathroom, which can mean water is getting behind the tub through failed caulk.
If you notice any of these, re-caulking sooner rather than later saves you from water damage. The seal around the tub is your bathroom’s first line of defense, and redoing it is far cheaper than repairing what leaks cause behind the scenes.
Do You Really Need a Caulking Gun?
A caulking gun is simply a lever-action holder that pushes caulk out of a standard cartridge tube. It gives you steady, controlled flow for long runs — handy for pros who caulk all day. But for a single bathtub, which usually needs only about fifteen to twenty feet of bead, a gun is optional.
Manufacturers sell the same sealants in squeeze tubes (typically 3 to 6 ounces), which you operate by hand just like a tube of toothpaste. These are made exactly for small jobs like sealing around a tub, sink, or toilet base. The smaller size actually makes the job easier for beginners: you have finer control over the flow, you waste almost nothing, and you do not have to fuss with a gun’s release lever or pressure rod.
Squeeze Tube vs. Caulking Gun: Pros and Cons
Squeeze tube advantages:
- No extra tool to buy, store, or learn to use.
- Easier to control the flow in short, tight sections.
- Less waste — one tube is about right for a standard tub.
- Cheaper total cost for a one-time job.
Squeeze tube disadvantages:
- Your hand gets tired on longer runs; you will want to work in shorter sections.
- Slightly harder to maintain a perfectly even bead, which is why smoothing matters.
- Not economical if you are caulking an entire bathroom or multiple fixtures.
For sealing one bathtub, the squeeze tube wins easily. If you ever take on bigger jobs, you can always graduate to a gun later.
What You Will Need
Gather everything before you start so you are not hunting for supplies with sticky hands halfway through.
- Kitchen and bath silicone caulk in a squeeze tube — labeled “mold and mildew resistant” or “bath and kitchen.” Choose a color that matches your existing caulk (white or clear/almond are the most common).
- Utility knife or caulk removal tool — to scrape out the old caulk.
- Rubbing alcohol or a household cleaner — to degrease the joint after the old caulk is out.
- Painter’s tape — the secret weapon for crisp, straight lines without a gun.
- Paper towels and a damp rag — for cleanup and smoothing.
- A spray bottle with water and a drop of dish soap — helps your finger glide when smoothing silicone.
- Disposable gloves — silicone is sticky and does not wash off skin easily.
- A small caulk smoothing tool or popsicle stick (optional) — your finger works fine, but a dedicated tool gives a more uniform finish.
Choosing the right caulk: For a bathtub, use 100% silicone or a silicone-latex hybrid labeled for kitchens and baths. Pure silicone is the most waterproof and flexible, which matters because tubs shift slightly as they fill with water. Avoid basic painter’s caulk or acrylic — it shrinks, cracks, and invites mold in wet areas. If your tub is a fiberglass or acrylic unit, check the label to confirm the caulk is compatible; most bath silicones are.
Step-by-Step: How to Caulk a Bathtub Without a Caulking Gun
Plan for about an hour of work plus a full day of curing. The steps matter more than the tools, so take your time on the prep — roughly eighty percent of a good caulk job is everything you do before the tube is even opened.
Step 1: Remove the old caulk completely
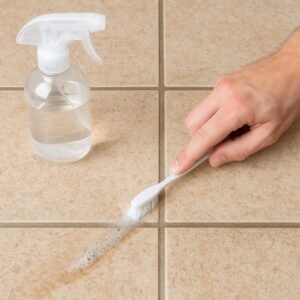
New caulk will not bond to old caulk, so every trace of the old bead has to go. Score along both edges of the old caulk line with a utility knife, then use the knife or a plastic caulk removal tool to pull the old strip out. Work slowly and let the blade do the work — you want the joint down to clean tub and clean tile or wall. For stubborn spots, a little rubbing alcohol on a rag helps loosen residue. Finish by scrubbing the joint with a bathroom cleaner, rinsing, and letting it dry completely. If you want to be thorough, wipe the joint with rubbing alcohol on a clean rag as a final degreasing step.
Step 2: Fill the tub with water
This is the step most guides skip, and it matters. A full tub weighs several hundred pounds and sits lower and wider than an empty one. If you caulk while the tub is empty and then fill it for a bath, the joint can stretch and crack your fresh bead. Fill the tub about halfway to three-quarters full before you apply caulk, so the seal sets in the tub’s “loaded” position.
Step 3: Tape the joint for clean lines
Run strips of painter’s tape along both sides of the joint — one strip on the tub, one on the wall or tile — leaving about a quarter-inch gap between them where the caulk will go. This is what replaces the precision of a caulking gun: the tape catches any wobbles and leaves razor-straight edges. Press the tape down firmly so caulk cannot bleed underneath.
Step 4: Cut the tube tip and test the flow
Cut the tip of the squeeze tube at a 45-degree angle. Start with a small opening — you can always cut more off, but you cannot add it back. The hole should roughly match the width of the gap you are filling, usually about an eighth of an inch for a tub joint. Squeeze a short test bead onto a piece of cardboard or a paper towel to get a feel for the pressure needed.
Step 5: Apply the caulk in short sections
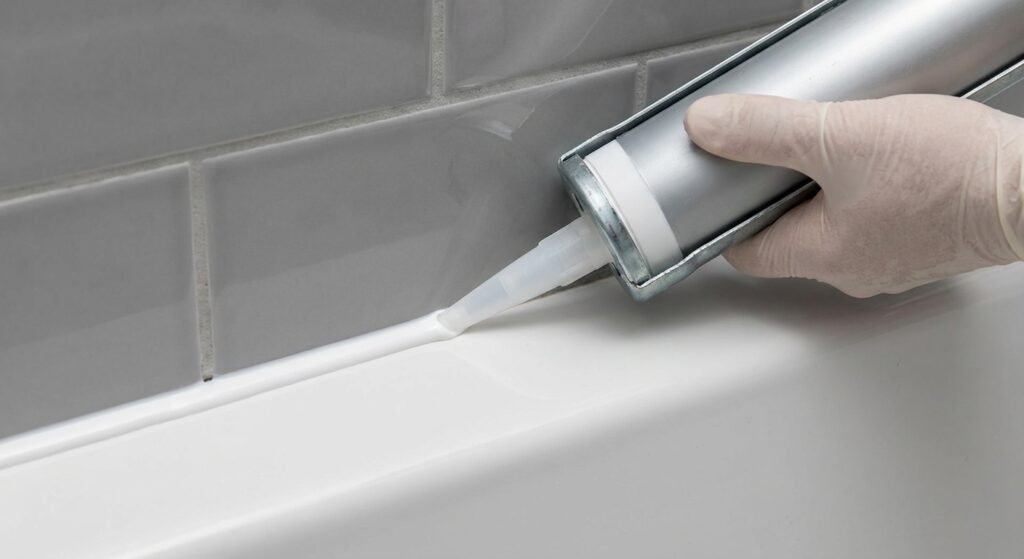
Start at one end of the tub and squeeze a steady, continuous bead into the joint, moving the tube slowly along the gap. Work in sections of about two feet at a time — shorter than you think — so the caulk does not start to skin over before you smooth it. Keep the tube angled at roughly 45 degrees and maintain light, even pressure. If the bead looks too thin, go over it again rather than trying to pile more on in one pass. When you need a break or reach the end of a section, release your grip to stop the flow.
Step 6: Smooth the bead with your finger or a tool
Wet your gloved finger in the soapy water and run it along the bead in one smooth, continuous stroke, pressing lightly to push the caulk into the joint and shape it into a slight concave curve. The soapy water keeps silicone from sticking to your glove. Wipe excess off your finger onto a damp paper towel between strokes. A smooth, even bead is not just cosmetic — it sheds water better and resists mold longer than a lumpy one.
Step 7: Pull the tape immediately
Do not wait for the caulk to dry. While the bead is still wet, peel the painter’s tape away at a sharp angle, pulling away from the joint. This leaves crisp, professional-looking edges. If you spot any small imperfections after the tape comes off, touch them up now with a damp finger — you have a short window before the caulk skins over.
Step 8: Let it cure fully
Drain the tub only after the caulk has set enough to hold its shape (check the tube label — usually an hour or two), but keep the tub out of use for the full cure time, typically 24 hours for silicone. Run the bathroom fan or open a window during curing; airflow and moderate humidity help silicone cure properly. Do not run water over the fresh bead or scrub it until it is fully cured.
Pro Tips for a Smooth, Professional Bead
- Work in a cool bathroom. Heat and humidity make silicone skin over faster, giving you less working time. If the bathroom is steamy, wait for it to cool and dry.
- Keep the bead narrow. A wide bead looks sloppy and collects water; a quarter-inch bead is ideal for most tub joints.
- Smooth in one direction. Back-and-forth strokes create ridges. One confident pass, then leave it alone.
- Use the tape method even if you are confident. Tape is free insurance for straight edges, and it takes two minutes to apply.
- Caulk the vertical corners too. Where the tub meets the wall at the corners, run a small bead down the vertical seam — water loves to collect there.
- Match the existing color elsewhere. If the rest of the bathroom is white caulk and you add almond, the repair will stand out. Consistency looks intentional.
Common Mistakes to Avoid
Caulking over old caulk. The number one reason DIY caulk jobs fail. New silicone barely bonds to old silicone — it will peel off in strips within weeks. Strip the joint to bare surfaces first, every time.
Applying caulk to a damp surface. Moisture trapped under the bead prevents adhesion and feeds mold from behind. The joint must be fully dry before you start.
Cutting the tip too large. A fat bead is hard to smooth and looks amateur. Start small; you can always enlarge the opening.
Skipping the tape. Even steady hands wobble over a fifteen-foot run. Tape turns shaky lines into straight ones.
Using the tub too soon. Silicone that has not fully cured will wash out of the joint or dent under use. Give it the full cure time on the label.
Choosing the wrong product. All-purpose acrylic caulk is easier to clean up but shrinks and cracks in a wet tub joint. Use a kitchen-and-bath silicone rated for constant moisture.
How Long Does Bathroom Caulk Last?
A well-applied silicone bead in a residential bathroom typically lasts three to five years. Cheaper latex caulks may fail within one to two years in a heavily used shower-tub combo. To stretch the life of your work: run the exhaust fan during and after showers, wipe down the tub edge occasionally to prevent soap scum buildup, and avoid harsh abrasive cleaners directly on the caulk line. When you see the first cracks or peeling edges, do not wait — a quick re-caulk is a weekend afternoon, while water damage repair is a contractor’s invoice.
Re-caulking is also a great companion project to other small bathroom refreshes. If you are already sprucing things up, painting a small bathroom without removing the toilet can make the whole room feel new in a weekend, and learning how to keep your bathroom mirror from fogging up after a shower adds a practical touch to the finished result.
Frequently Asked Questions
Can I caulk over old caulk if it still looks okay?
No. Even caulk that looks intact has lost its bond strength and is likely harboring mold underneath. New caulk applied over old caulk peels quickly. Remove the old bead completely down to the bare tub and wall surfaces.
What is the best caulk for a bathtub?
Use a 100% silicone caulk labeled for kitchens and baths with mold and mildew resistance. It stays flexible, bonds to tub and tile surfaces, and withstands constant moisture far better than acrylic or latex caulks.
How long should I wait before using the tub after caulking?
Follow the cure time on the tube, which is usually 24 hours for silicone. The caulk may feel dry to the touch within an hour, but full waterproof strength takes the full cure time. Do not run water over it until then.
Why does my bathtub caulk keep cracking?
The most common causes are caulking with the tub empty (the tub flexes under water weight and cracks the seal), using a non-flexible acrylic caulk, or applying caulk over a damp or dirty joint. Fill the tub before caulking, use silicone, and prep the surfaces properly.
How do I remove silicone caulk from skin or surfaces?
Wear gloves to avoid the issue entirely. If silicone gets on skin, wipe it off immediately with a dry paper towel before it cures — soap and water will not dissolve cured silicone. On hard surfaces, a plastic scraper and rubbing alcohol remove residue.