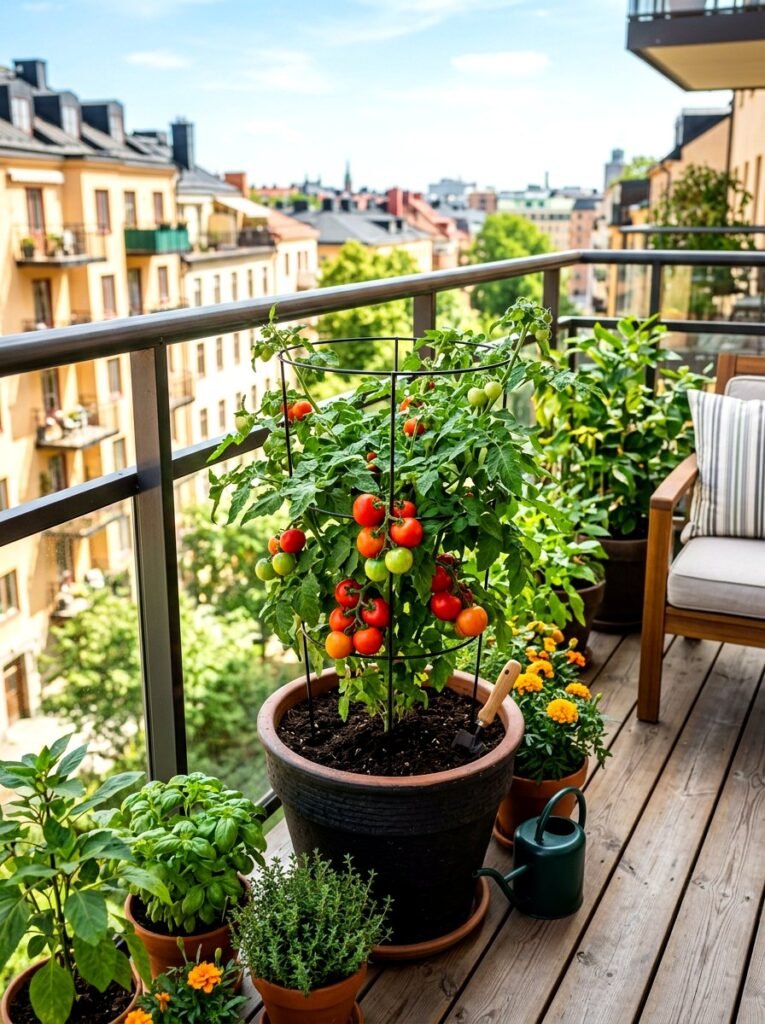
You do not need a backyard to grow your own food. Learning how to start a vegetable garden on an apartment balcony for beginners is mostly about three things: enough sun, the right containers, and beginner-friendly crops that forgive mistakes. With even a small balcony, you can harvest tomatoes, herbs, peppers, and salad greens all season long.
Why Balcony Gardening Works So Well for Beginners
A balcony garden is actually easier to manage than a full backyard plot. The small scale means less weeding, fewer pests, and a watering routine that takes minutes. Containers also give you total control over soil quality — no fighting with clay, rocks, or bad drainage. Many beginners find they succeed on a balcony first and tackle bigger gardening projects later.
The main limitation is space and weight, not skill. A 4-by-8-foot balcony can hold 8 to 12 productive containers if you use vertical space wisely.
Step 1: Assess Your Balcony’s Sunlight
Before buying anything, spend one day noting how much direct sun your balcony gets. This single factor decides what you can grow.
- 6+ hours of direct sun: You can grow almost anything — tomatoes, peppers, cucumbers, squash.
- 4 to 6 hours: Leafy greens, herbs, beans, radishes, and dwarf varieties thrive here.
- Less than 4 hours: Stick to lettuce, spinach, arugula, mint, parsley, and chives.
Check your rental rules too. Many apartment buildings limit railing planters, hanging weight, or watering that drips onto lower balconies. A quick read of your lease or a note to your landlord now prevents headaches later. If you rent, the same damage-free thinking that helps with hanging pictures without nails in an apartment applies to garden mounting — use freestanding racks and rail clamps that leave no marks.
Step 2: Choose the Right Containers
Size Matters More Than Material
Beginners almost always pick pots that are too small. Small pots dry out fast and stunt roots. Use these minimum sizes:
- Tomatoes: 5-gallon buckets or pots, one plant per container
- Peppers: 3-gallon pots, one plant each
- Herbs: 1-gallon pots, one plant each (or a long trough for several)
- Lettuce and greens: shallow, wide containers at least 6 inches deep
- Cucumbers and beans: 5-gallon containers with a trellis for climbing
Material Pros and Cons
- Plastic: Cheap, lightweight, retains moisture well. Best choice for balconies with weight limits.
- Fabric grow bags: Excellent drainage, promote healthy roots, light and foldable. Dry out faster, so water more often.
- Terracotta: Attractive and breathable, but heavy and dries out quickly. Risky above the second floor if they tip.
- Self-watering planters: Higher cost, but they forgive missed waterings — ideal for beginners with busy schedules.
Whatever you choose, every container must have drainage holes. Without them, roots rot and plants die. Set pots on saucers or a drip tray to protect the balcony floor and the neighbors below.
Step 3: Pick Beginner-Friendly Vegetables
Start with crops that are hard to kill and harvest quickly. Fast results keep you motivated.
Easiest Crops (High Success Rate)
- Cherry tomatoes: The classic balcony crop. One plant yields dozens of fruits. Look for compact “patio” or “dwarf” varieties.
- Lettuce and salad mix: Harvest in about a month. Cut outer leaves and the plant keeps producing.
- Radishes: Ready in about 25 days — the fastest harvest of any vegetable.
- Herbs (basil, mint, chives, parsley): Grow in small pots, need little care, and elevate everyday cooking.
- Bush beans: No trellis needed, produce heavily, and actually improve the soil.
Worth Trying Once You Have Confidence
- Bell and chili peppers: Love heat and containers, but are slower to fruit.
- Cucumbers: Very productive with a trellis, but thirsty — check water daily.
- Carrots: Need deep pots (at least 10 inches) and loose soil, but kids love pulling them up.
Crops to Skip on a Balcony
- Corn — needs large blocks for pollination and grows too tall
- Pumpkins and melons — need enormous space and weight
- Potatoes — possible, but the yield per square foot is poor in containers
Step 4: Soil, Seeds, and Planting
Use Potting Mix, Not Garden Soil
Garden soil from the ground compacts in containers and suffocates roots. Buy bagged potting mix labeled for containers or vegetables. It is light, drains well, and often includes slow-release fertilizer. For even better results, mix in a handful of compost per pot.
Seeds vs. Seedlings
Beginners do best starting with seedlings (young plants from a nursery) for tomatoes, peppers, and herbs — you skip the fragile sprouting stage. Direct-sow seeds for lettuce, radishes, beans, and carrots, which germinate easily and resent transplanting.
Planting Depth Rules
Follow the seed packet, but two rules of thumb cover most cases: plant seeds twice as deep as they are wide, and bury tomato seedlings deep — up to their first leaves. Tomatoes grow roots along the buried stem, making the plant stronger.
Step 5: Watering — The Skill That Decides Everything
Most balcony garden failures are watering failures. Containers dry out far faster than ground soil, especially in wind and sun.
- Check daily: Push your finger an inch into the soil. Dry? Water. Moist? Wait.
- Water deeply, not often: Water until it flows from the drainage holes, then let the soil dry slightly before the next watering.
- Water the soil, not the leaves: Wet foliage invites disease. Morning watering is best — it lets leaves dry during the day.
- Mulch the surface: A layer of straw or shredded leaves on top of the soil slows evaporation dramatically.
- Watch the wind: Balconies above the third floor can be surprisingly windy, which dries pots fast. A windbreak of lattice or fabric helps.
Step 6: Feeding Your Plants
Potting mix nutrients wash out with watering, so container plants need regular feeding. Use a balanced liquid vegetable fertilizer every two weeks, following the label dose. Beginners should halve the recommended strength at first — it is easy to burn plants with too much fertilizer and hard to recover from it.
Herbs need less feeding than fruiting crops. If your basil looks pale and leggy, it usually needs more light, not more food.
Dealing With Balcony Pests Naturally
Container gardens get fewer pests than ground gardens, but aphids, spider mites, and whiteflies still show up. Handle them the gentle way:
- Blast with water: A strong spray from a hose nozzle knocks aphids off instantly.
- Neem oil spray: Effective against most soft-bodied insects and safe for food crops when used as directed.
- Companion planting: Marigolds and basil near tomatoes repel several common pests.
- Hand-pick: Check leaf undersides weekly and remove eggs or caterpillars by hand.
If ants start farming aphids on your plants, treat it like a household pest problem — getting rid of ants without harsh chemicals uses the same gentle, food-safe principles that work around edible plants.
Common Beginner Mistakes to Avoid
- Overcrowding pots: Three tomato seedlings in one pot means three weak plants. One strong plant outyields three crowded ones.
- Starting too big: Twelve containers overwhelm a beginner. Start with four to six and expand once watering becomes routine.
- Ignoring weight limits: Wet soil is heavy. A 5-gallon pot can weigh 40 pounds. Check your balcony’s load rating and spread weight across the slab, not just the railing.
- Planting out of season: Tomatoes planted in cold soil sit and sulk. Wait until nights are reliably warm for heat-lovers; grow greens in the cooler shoulder months.
- Forgetting to harvest: Lettuce left too long turns bitter, and unpicked beans stop producing. Harvesting encourages more growth.
A Simple First-Month Plan
Week 1: Setup
Measure sunlight, buy 4 to 6 containers, potting mix, and seedlings. Drill drainage holes if needed and arrange pots with saucers.
Week 2: Planting
Fill pots with mix, plant seedlings and seeds, water deeply, and mulch the surface. Place tall plants where they will not shade shorter ones.
Week 3: Routine
Establish the daily finger-test watering habit. Add a trellis or stakes for climbers. Start half-strength fertilizer if plants show new growth.
Week 4: First Harvests
Radishes and baby greens may already be ready. Pinch basil tips to encourage bushy growth. Scout for pests during watering.
Frequently Asked Questions
How much does it cost to start a balcony vegetable garden?
A starter setup of five containers, potting mix, seeds, and a few seedlings typically runs 40 to 80 dollars. Fabric grow bags and seeds are the cheapest route; self-watering planters cost more up front but save time all season.
Can I grow vegetables on a north-facing balcony?
Yes, but choose accordingly. North-facing balconies get little direct sun, so grow lettuce, spinach, arugula, herbs like mint and parsley, and radishes. Skip tomatoes and peppers unless you can supplement with a grow light.
How often should I water balcony vegetables in summer?
Usually once a day, sometimes twice during heat waves or on windy high balconies. The finger test beats any schedule — small pots in full sun dry out fast, while large pots in shade may need water only every other day.
Do I need to worry about my balcony collapsing under the weight?
Most balconies handle container gardens fine if you keep pots modest and spread the load. Avoid lining heavy 5-gallon pots along a railing edge. If you are unsure about your building’s limits, use lightweight plastic or fabric pots and ask your landlord or building manager.
What is the easiest vegetable for a total beginner?
Cherry tomatoes from a nursery seedling. They are forgiving, productive, and the taste of a sun-warmed tomato you grew yourself is the best motivation to keep gardening.
Can I garden on my balcony year-round?
In mild climates, yes — grow greens and herbs through the cooler months. In cold climates, the season runs spring through fall, but you can extend it with row covers or move herbs indoors to a sunny windowsill for winter.