Learning how to remove rust from garden tools without sandpaper is easier than most people expect, and it is often gentler on the tools themselves. Sandpaper can strip away good metal along with the rust, scratch a smooth blade, and leave a rough surface that rusts again faster. Household methods based on vinegar, lemon, and careful scrubbing can dissolve light and moderate rust while leaving more of the original metal intact. With a little patience and the right follow-up care, pruners, trowels, shovels, and shears can look and work much better, often without a trip to the hardware store.
Rust forms when iron or steel meets moisture and oxygen, which is exactly what garden tools face every time they are left damp in soil, rain, or a humid shed. A thin orange film may seem harmless, but it dulls cutting edges, stiffens hinges, and makes tools harder to clean after each use. Left alone, rust eats deeper into the metal, pits the surface, and weakens the tool. Catching it early makes removal far easier, which is why a quick check after gardening is worth building into your routine.
Safety First: Protect Yourself and Check the Tool
Before you start, put on gloves and eye protection. Vinegar and lemon juice can sting cuts, irritate skin with repeated contact, and splash into eyes during scrubbing, so sturdy household gloves and safety glasses or sunglasses with side coverage are a sensible minimum. Work outdoors or in a well-ventilated space, keep the vinegar away from your face, and wash your hands after handling rusty metal and cleaning solutions. If you have sensitive skin, choose longer gloves that cover your wrists, and avoid touching your face while you work.
Just as important is an honest check of the tool itself. Do not use a rust-damaged tool with weakened or pitted metal until it has been checked. Deep pitting, thinning blades, cracks near a handle, or a head that wobbles on its handle are warning signs that cleaning alone will not fix. A weakened pruner blade can snap under pressure, and a loose shovel or axe head can come off during use, so set any doubtful tool aside for repair or replacement. Cosmetic surface rust on a solid tool is a cleaning job; structural damage is a safety decision, and the two should never be confused.
Assess the Rust Before You Choose a Method
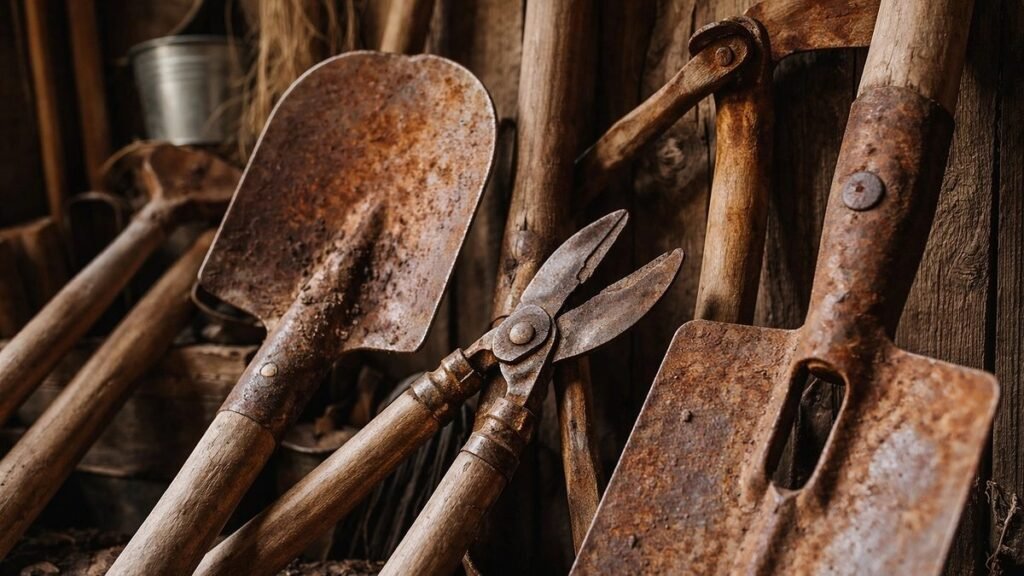
Start by brushing off loose dirt and dried soil with an old brush or a stiff cloth, then look closely at the metal. Light rust appears as a dusty orange film that rubs off easily and leaves mostly smooth metal beneath. Moderate rust feels rough, covers larger patches, and may darken to brown, but the shape of the tool is still solid and the edge is still thick. Heavy rust is flaky, deeply pitted, and may have eaten through thin edges or joints, and that level of damage needs a closer safety check before any cleaning method is used.
Matching the method to the rust level saves time and protects the tool. Light rust often responds to a paste or a short soak, while moderate rust usually needs a longer vinegar soak and more scrubbing. Trying the gentlest method first is a good habit, because you can always repeat it or move to a stronger approach, but you cannot undo metal removed by aggressive scrubbing. Take a photo or make a mental note of the worst spots, so you can judge whether a second round is actually improving the surface or just wearing it down.
The Vinegar Soak: The Most Reliable Method
White vinegar is the workhorse of rust removal without sandpaper, because its mild acidity dissolves rust without the harsh abrasion of sanding. For hand tools such as trowels, pruners, and small shears, fill a container deep enough to cover the rusty metal parts with plain white vinegar. Remove wooden handles if they unscrew easily, and avoid soaking wooden or plastic parts for long periods, since vinegar can dry out wood and dull some finishes. Keep the container where it will not be knocked over, and away from children and pets.
Soaking time depends on the rust. Light rust may loosen within a few hours, while moderate rust often needs a full soak lasting through the day or overnight. Check the tool every few hours and lift it out when the rust looks soft and darkened rather than hard and crusty. Leaving a tool in vinegar for far longer than needed will not speed up the work, and extended soaking can darken metal and roughen the surface, so regular checks matter more than a long, forgotten soak.
Once the rust has softened, scrub the tool with a wire brush, a stiff nylon brush, or a ball of crumpled aluminum foil dipped in vinegar. Aluminum foil is surprisingly effective for light rust, because it is abrasive enough to lift softened rust yet softer than steel, so it is less likely to gouge the surface. Work along the shape of the blade rather than across it, rinse often, and pay extra attention to joints, hinges, and the area where a blade meets a handle, where rust likes to hide.
Lemon, Salt, and Baking Soda for Lighter Rust
For light rust, or for tools that are awkward to soak, lemon and salt make a useful spot treatment. Sprinkle coarse salt over the rusty area, squeeze lemon juice over it until the surface is damp, and let the mixture sit for a couple of hours. The acid in the lemon helps loosen the rust, while the salt adds gentle scrubbing action. After soaking, rub the area with the lemon rind or a soft cloth, then rinse well. This method works best on flat surfaces and small patches, and it is a good choice for tools you want to clean quickly without setting up a soaking container.
Baking soda paste is another gentle option, especially for tools with painted parts or delicate finishes that you do not want to expose to vinegar. Mix baking soda with a little water to form a thick paste, spread it over the rust, and leave it for an hour or more. Then scrub with an old toothbrush or a nylon pad and rinse thoroughly. Baking soda is less aggressive than vinegar, so it may need a second application for stubborn spots, but its mildness makes it a safe first try for tools you are worried about damaging.
Scrubbing Without Sandpaper: What to Use Instead
The goal of scrubbing after a soak is to lift softened rust, not to grind the metal. A wire brush is effective for sturdy tools such as shovels and hoes, while a brass brush is gentler and a better match for thinner blades. Nylon scrub pads, old toothbrushes, and crumpled aluminum foil all work for detail areas, hinges, and engraved markings where a large brush cannot reach. Choose the softest tool that still removes the rust, and let the soak do most of the work.
Steel wool can also help, but use it with care and only in a fine grade on solid metal, because coarse steel wool can scratch a blade almost as much as sandpaper. Whatever scrubber you choose, rinse the tool frequently so you can see your progress, and stop when the surface feels smooth and the orange color is gone. If a spot refuses to budge after two rounds of soaking and scrubbing, it may be deep pitting rather than surface rust, and further scrubbing will only thin the metal around it.
Clean, Dry, and Oil After Rust Removal
The step most people skip is also the one that decides whether rust comes back quickly. After scrubbing, wash the tool thoroughly with warm water and a little dish soap to remove all vinegar, lemon, salt, and loosened rust. Any acid left on the surface will keep working and can encourage new rust, so rinse until the water runs clear and the metal no longer smells of vinegar. Dry the tool immediately with a clean cloth, and let it air dry fully in a breezy spot before putting it away, since even a thin film of moisture can restart rusting.
Once the tool is completely dry, protect the metal with a light coat of oil. Mineral oil, camellia oil, or a general-purpose tool oil all work well for garden tools; apply a thin layer with a cloth, wipe off the excess, and pay attention to hinges and moving joints. A light oiling creates a barrier against moisture and keeps pruners and shears moving smoothly. Avoid heavy grease on cutting tools, because it attracts dirt and soil, and never oil a tool that is still damp, since the oil will trap moisture against the metal.
Sharpening comes after cleaning, not before. A rusty edge is hard to judge, and sharpening too early can grind rust into the edge or hide pitting. Once the blade is clean, dry, and oiled, sharpen it lightly with a file or sharpening stone made for garden tools, following the original angle of the edge. A sharp, clean blade cuts plants cleanly, which helps plants heal faster, and it makes the next gardening session noticeably easier.
Preventing Rust in the Future
Prevention is simpler than removal, and it mostly comes down to keeping tools dry and clean. Shake off soil after each use, wipe blades with a dry cloth, and store tools indoors in a dry shed or garage rather than leaving them outside. Hanging tools on a wall keeps them off damp floors and improves airflow around them, while a bucket of sand mixed with a little oil makes a handy cleaning station: plunging a tool into the sand after use removes soil and leaves a light oil coating in one motion.
Seasonal care helps too. At the end of a busy gardening period, give each tool a quick inspection, clean off any early rust spots, oil the metal, and check handles for cracks or looseness. Wooden handles benefit from a rub with linseed oil or a similar wood oil, which keeps them from drying and splintering. These small habits take only a few minutes per tool, yet they can add years to the life of good garden equipment and make deep rust a rare problem rather than a regular chore.
Mistakes to Avoid
One common mistake is reaching for sandpaper or a grinding wheel at the first sign of rust, which removes healthy metal and can ruin a sharp edge. Another is soaking a whole tool, handle and all, in vinegar for days, which can damage wood, loosen glue, and darken metal unnecessarily. Skipping the rinse and drying steps is equally costly, because leftover acid and moisture invite rust back faster than before. Finally, ignoring structural damage is the most serious mistake: a shiny but weakened blade is more dangerous than a rusty-looking but solid one, so always check strength and handle fit before returning a tool to use.
It is also worth avoiding shortcuts that sound clever but cause harm, such as using strong industrial acids or oven cleaners on garden tools. These products can damage metal, harm skin and eyes, and leave residues that are unsafe around soil and plants. Household vinegar, lemon, and baking soda are slower, but they are safer for the user, the tool, and the garden. Patience is part of the method, not a flaw in it.
FAQs
Does vinegar really remove rust from garden tools?
Yes, white vinegar dissolves light and moderate rust when the tool is soaked long enough for the rust to soften. After soaking, gentle scrubbing with a brush or aluminum foil lifts the rust away without the harsh abrasion of sandpaper.
How long should I soak rusty garden tools in vinegar?
Light rust may loosen within a few hours, while moderate rust often needs a longer soak. Check the tool every few hours and remove it once the rust looks soft and darkened, then scrub, rinse, and dry it thoroughly.
Can I use lemon and salt instead of vinegar?
Yes, lemon and salt work well for light rust and small patches. Sprinkle salt on the rust, add lemon juice, let it sit for a couple of hours, scrub gently, and rinse well. For heavier rust, a vinegar soak is usually more effective.
Do I need to wear gloves when using vinegar on rust?
Yes, wear gloves and eye protection when handling vinegar and scrubbing rusty tools. Vinegar can irritate skin and sting cuts, and scrubbing can splash liquid and rust particles toward your eyes.
When should a rusty garden tool be replaced instead of cleaned?
Replace or repair a tool if the metal is deeply pitted, thinned, cracked, or weakened, or if a head wobbles on its handle. Do not use such a tool until it has been checked, because it can snap or come apart during use.
How do I stop garden tools from rusting again?
Clean off soil after each use, dry tools fully, store them indoors in a dry place, and apply a light coat of oil to metal parts. Hanging tools on a wall and oiling them during seasonal care also helps prevent new rust.