
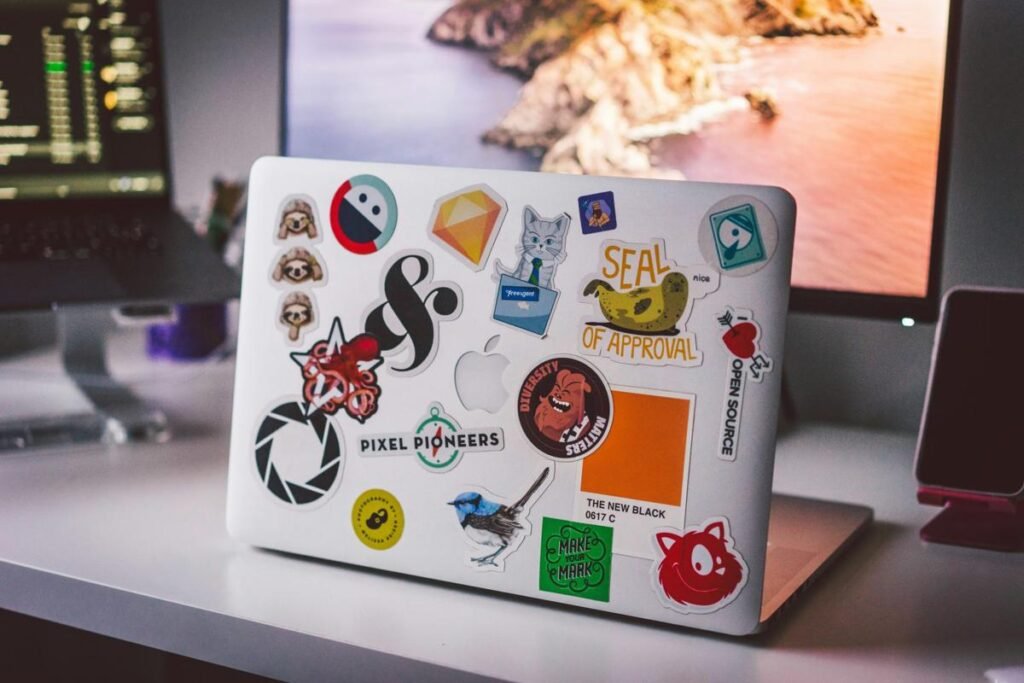
Stickers personalize a laptop, but the moment you want a clean lid again, the real challenge begins. Peel too fast and the sticker tears, leaving shreds of paper and a sticky film that attracts dust and looks worse than the sticker did. If you want to learn how to remove stickers from a laptop without leaving residue, the secret is patience and the right sequence: loosen the adhesive first, peel slowly at a low angle, then clean up whatever tiny trace remains with a method that suits your laptop’s finish. Done properly, the whole job takes only a few minutes per sticker and leaves no mark behind.
Why Stickers Leave Residue in the First Place
A sticker is held on by a layer of adhesive, and that adhesive behaves differently depending on age, heat, and material. Fresh stickers usually peel off cleanly because the adhesive is still soft and bonded mainly to the sticker backing. Older stickers are a different story. Sunlight, heat from the laptop itself, and time cause the adhesive to harden and bond more strongly to the surface, while the sticker paper or vinyl becomes brittle. When you pull, the top layer separates from the adhesive layer, and the glue stays behind.
The laptop surface matters too. Smooth metal lids, such as aluminum, release adhesive more easily than textured plastic, which gives the glue more grip. Matte finishes and soft-touch coatings are the trickiest, because aggressive scrubbing can dull or damage them. Knowing your surface before you start helps you choose a safe method rather than the strongest one. When in doubt, always test a cleaning product on a small hidden corner first, such as the underside edge of the lid, and wait a minute to check for discoloration.
Before You Start: What You Need
Gather a few simple supplies before peeling anything: a hair dryer, a plastic card such as an old credit card or loyalty card, a roll of clear tape, a soft microfiber cloth, and a gentle cleaning agent. Good cleaning options include warm soapy water, cooking oil, or rubbing alcohol, and this guide explains when each is appropriate. Avoid metal scrapers, razor blades, and abrasive pads entirely. They can gouge plastic and scratch metal in a single careless stroke, and the damage they cause is permanent in a way that sticker residue is not.
Power the laptop off and unplug it, then close the lid if the stickers are on the outside. Working on a closed, cool laptop is safer and gives you a stable surface. If the sticker is inside, on the palm rest or near the keyboard, work carefully around the keys and trackpad, and never let liquid pool near openings. A little patience at this stage prevents most accidents.
Step 1: Peel Slowly at a Low Angle
Start with the simplest method, because many stickers come off cleanly with technique alone. Find a corner or edge of the sticker and lift it gently with a fingernail or the edge of a plastic card. Once you have a tab to grip, pull slowly and steadily at a low angle, close to the surface rather than straight up. Pulling flat keeps the adhesive attached to the sticker instead of the laptop, and it reduces tearing.
If the sticker starts to tear, stop. Do not yank the remaining piece. Instead, roll the torn edge back slowly, or move to the heat method below before continuing. Rushing this step is the most common reason people end up with residue. A sticker that takes thirty seconds to peel cleanly beats one that takes ten seconds to shred and twenty minutes to clean up.
Step 2: Use Gentle Heat to Loosen Stubborn Adhesive
Heat is the safest way to soften old or stubborn adhesive. Set a hair dryer to a low or medium heat setting and hold it about six inches from the sticker, moving it back and forth for twenty to thirty seconds. The goal is warm, not hot. You should be able to touch the surface comfortably. Once the sticker feels warm and slightly soft, peel it slowly at a low angle as before. The adhesive will usually stretch and lift with the sticker instead of staying behind.
Work in sections for large stickers. Heat one area, peel it, then heat the next. Do not hold the dryer in one spot for a long time, and never use a high heat setting or a heat gun on a laptop. Excessive heat can warp plastic, damage the finish, or harm the battery if applied to the base of the machine. Gentle, brief warmth is all you need. If the sticker cools and starts resisting again, reheat briefly and continue.
Step 3: Remove Leftover Residue Safely
Even with perfect technique, a faint sticky trace sometimes remains. The right cleanup method depends on your laptop’s finish, so choose from the options below and test first.
Warm Soapy Water for Light Residue
Dampen a microfiber cloth with warm water and a drop of dish soap, wring it out well, and rub the sticky area in small circles. This handles fresh, light residue on any surface and is the safest first choice. Wipe with a clean damp cloth afterward to remove soap, then dry the area. Avoid getting the cloth dripping wet, especially near vents, ports, and hinges.
Cooking Oil for Stubborn Glue
A tiny amount of cooking oil dissolves many adhesives effectively. Put a drop on a cloth, not directly on the laptop, and rub the residue gently until it rolls up into small bits. Wipe the area thoroughly with soapy water afterward to remove all oil, because leftover oil attracts dust. Oil works well on smooth metal and hard plastic, but use it sparingly on matte or soft-touch finishes, and test a hidden spot first.
Rubbing Alcohol for Smooth Metal and Hard Plastic
Rubbing alcohol is excellent at dissolving adhesive, and it evaporates quickly without leaving a film. Dampen a cloth with a small amount and rub the residue until it lifts. This method is best for smooth aluminum and hard plastic lids. Avoid it on soft-touch coatings, rubberized surfaces, and printed designs, because alcohol can dull or strip those finishes. Never pour alcohol directly onto the laptop, and keep it away from the screen, since it can damage screen coatings.
Clear Tape for Tiny Bits
For small flakes and faint stickiness, press a piece of clear tape firmly onto the area and peel it away. Repeat with a fresh piece until the surface feels smooth. This method is gentle, works on every finish, and is surprisingly effective for the final cleanup after the main sticker is gone.
Cleaning Up Afterward for a Like-New Finish
Once the residue is gone, give the whole lid a final wipe with a clean microfiber cloth slightly dampened with water. This removes any cleaning product film and reveals whether any faint outline remains. If you can still see a ghost image where the sticker sat, it is usually a difference in fading rather than leftover glue: the covered area stayed newer while the exposed finish aged slightly. A gentle wipe will not remove fading, but it often becomes less noticeable over time as the surface evens out. Do not scrub harder to chase a faded outline, because you risk damaging the finish.
Inspect the laptop in good light before calling the job done. Residue hides along edges and in corners, and a quick final pass with tape or a damp cloth catches what your fingers missed. Run a fingertip lightly over the area. If it glides smoothly without catching, the surface is clean.
Mistakes to Avoid
The biggest mistake is reaching for the strongest solvent first. Nail polish remover, acetone, and harsh household cleaners can dissolve laptop finishes, melt plastic, and strip printed logos. They may remove the glue quickly, but the damage they leave is far worse than any residue. Another common error is scrubbing with paper towels or scouring pads, which leave fine scratches on metal and dull plastic. Microfiber cloths exist for a reason: they clean without scratching.
Do not peel stickers off a hot laptop straight after heavy use, because warm adhesive tears more easily and the surface is harder to work on. Let the machine cool first. Do not use a knife, key, or metal edge to lift a corner, and do not spray cleaning products directly onto the laptop. Spray onto the cloth instead, so liquid never runs into vents, hinges, or the keyboard. Finally, avoid sticking new stickers over old residue. The new sticker will bond unevenly and leave an even messier layer when it is eventually removed.
Pros and Cons of Each Removal Method
Peeling by hand is free, safe for every finish, and works well on fresh stickers, but it fails on old, brittle ones. Heat works on almost any sticker and greatly reduces residue, yet it requires care to avoid overheating the surface. Soapy water is the safest cleanup option but the weakest on stubborn glue. Cooking oil dissolves tough adhesive well and is cheap, but it needs thorough cleanup afterward. Rubbing alcohol is fast and leaves no film, but it is unsuitable for soft-touch and rubberized finishes. Tape is the gentlest finishing touch but too slow for a whole sticker. In practice, the best results come from combining methods: heat and slow peeling first, then the gentlest cleanup that finishes the job.
How to Keep the Lid Looking Clean Long Term
If you enjoy decorating your laptop, choose removable vinyl stickers rather than paper ones. Vinyl peels off in one piece far more reliably, and quality removable stickers use a lighter adhesive designed for clean removal. Avoid placing stickers over vents, hinges, or logos you want to preserve, and avoid layering stickers on top of each other. When you remove a sticker, clean the area right away instead of leaving residue to harden over weeks. A two-minute cleanup today saves a twenty-minute scrub later, and it keeps the lid looking as clean as the day the laptop arrived.
FAQs
Can I remove stickers from a laptop without damaging it?
Yes, if you peel slowly, use gentle heat for stubborn stickers, and choose a cleaning method suited to your finish. Damage almost always comes from sharp tools, abrasive pads, or harsh solvents, not from careful peeling.
What removes sticker residue from a laptop best?
For most laptops, gentle heat followed by rubbing alcohol on smooth metal or hard plastic, or warm soapy water on delicate finishes, works best. Cooking oil is a good backup for stubborn glue. Always test the cleaner on a hidden spot first.
Is rubbing alcohol safe on a laptop lid?
It is safe on smooth aluminum and hard plastic, but not on soft-touch coatings, rubberized finishes, or printed designs, which it can dull or strip. When in doubt, use warm soapy water instead.
How do I remove a sticker that keeps tearing?
Stop peeling and apply gentle heat with a hair dryer on a low setting for twenty to thirty seconds, then peel slowly at a low angle. Working in small heated sections prevents the brittle sticker from shredding further.
Can I use a hair dryer on my laptop safely?
Yes, on a low or medium setting held about six inches away and moved constantly. Never use high heat or a heat gun, and never hold the dryer still in one spot, because concentrated heat can warp plastic or damage the finish.
Why is there a faded outline after removing a sticker?
The outline is usually uneven fading, not leftover glue. The covered area was protected from light and wear while the surrounding finish aged slightly. It fades and becomes less noticeable over time, and gentle cleaning is the only safe response.












1 thought on “How to Remove Stickers From a Laptop Without Leaving Residue”
Comments are closed.