
Learning how to meal prep chicken for the week without it drying out is the difference between lunches you look forward to and sad, chalky containers you dread opening. The good news: dry meal-prep chicken is not inevitable. It is almost always the result of a few fixable mistakes — the wrong cut, too much heat, no rest time, or reheating at full blast. Follow the method below and you can cook a full batch of juicy, tender chicken in about an hour, then enjoy it for days.
Why Chicken Dries Out: The Science in Plain English
Chicken muscle is mostly water held inside protein fibers. When heat hits the meat, those proteins contract and squeeze water out — the hotter and longer the cook, the harder the squeeze. Two types of moisture matter here:
- Free water: the water sitting between fibers. It leaks out easily when meat is overcooked or cut too soon.
- Bound moisture: water trapped inside the protein structure itself. Once heat forces it out, no amount of sauce can fully replace it.
Chicken breast dries out fastest because it is very lean — fat also carries a feeling of juiciness, and breast meat has little of it. Thighs stay forgiving because of their higher fat and connective tissue. Understanding this one fact explains nearly every tip below: the goal of good meal prep is to protect moisture from the start, not rescue it at the end.
Best Cuts for Meal Prep: Breasts vs. Thighs
Choose your cut based on how forgiving you want the process to be.
Boneless, Skinless Chicken Thighs (Easiest Win)
Thighs are the most meal-prep-friendly cut. Their extra fat and collagen keep them juicy even if you overshoot the temperature by a few degrees, and they reheat beautifully. If you have ever struggled with dry chicken, start here. The only downside: slightly higher calorie count and a less uniform shape.
Boneless, Skinless Chicken Breasts (Leanest, Needs Technique)
Breasts are the classic meal-prep protein — high protein, low fat, easy to slice over salads and grain bowls. But they have a narrow window: juicy at 150 to 160 degrees Fahrenheit, dry and stringy past 165. They also cook unevenly because the thick end is much thicker than the thin end. Fix this by pounding the thick end down to an even three-quarter-inch thickness before cooking.
Other Options Worth Knowing
- Chicken tenderloins: cook fast and stay tender, but overcook in a blink — use a thermometer and pull early.
- Bone-in thighs or drumsticks: very forgiving and flavorful, but less versatile for slicing into bowls.
Bottom line: beginners should pick thighs. Once you are comfortable with a thermometer, breasts are perfect for lean weekly prep.
Brining and Quick Marinades: Insurance for Juiciness
A brine or marinade is the single biggest upgrade you can make. It seasons the meat all the way through and helps it hold onto water during cooking.
The 30-Minute Wet Brine
Dissolve one quarter cup of kosher salt in four cups of cold water. Submerge the chicken and refrigerate for 30 to 60 minutes (no longer for breasts, or the texture turns spongy). Rinse, pat dry, and cook. This works because salt slightly unwinds the proteins so they trap more water.
Quick Dry Brine (Best for Flavor)
Sprinkle the chicken generously with kosher salt — about three quarters of a teaspoon per pound — plus pepper, garlic powder, and paprika. Rest uncovered in the fridge for one to four hours. The salt first draws moisture out, then the meat reabsorbs it seasoned. The surface also dries slightly, which means better browning.
Five-Minute Acid Marinades (Use Carefully)
Olive oil, lemon juice, garlic, and herbs make a fast marinade, but keep acid contact under two hours for breasts — acids “cook” the outside and can make the texture mushy. Yogurt-based marinades are gentler and work wonderfully for up to eight hours, since dairy is only mildly acidic.
Cooking Methods Compared: Which Keeps Chicken Juiciest?
Every method below works for a weekly batch. Pick based on your schedule and equipment.
Poaching: The Juiciest Method
Submerge seasoned chicken in barely simmering water or broth (about 170 to 180 degrees — gentle bubbles, never a rolling boil) for 12 to 15 minutes until done. Because the meat never exceeds the water’s temperature, it is nearly impossible to dry out. Poached chicken is plain on its own, which makes it a perfect blank canvas for sauces and dressings later in the week.
Oven Baking: The Batch King
Arrange brined chicken on a sheet pan, drizzle with oil, and bake at 400 degrees Fahrenheit for 18 to 22 minutes depending on thickness. High heat plus short time browns the outside before the inside dries. A wire rack on the pan lets hot air circulate underneath for even cooking.
Grilling: Best Flavor, Needs Attention
Grill over medium-high heat, two to three minutes per side for breasts, a little longer for thighs, then move to indirect heat to finish. The char and smoke are unbeatable, but the direct flame punishes inattention — use a thermometer, not guesswork.
Slow Cooker: Set and Forget
Cook on low for three to four hours in a little broth or salsa. The moist environment is extremely forgiving, and the chicken shreds easily for tacos, sandwiches, and soups. Watch the clock, though: even in a slow cooker, chicken left for eight hours turns stringy.
Air Fryer: Fast and Crisp
Cook at 375 degrees for 12 to 15 minutes, flipping once. The circulating hot air crisps the outside quickly. Because it cooks fast, it is easy to overshoot — check the temperature a couple of minutes early.
Target Temperatures: Trust the Thermometer, Not the Clock
An instant-read thermometer is the cheapest insurance against dry chicken. Insert it into the thickest part without touching bone.
- Chicken breasts: pull at 150 to 155 degrees Fahrenheit. Carryover heat will finish the job during resting.
- Chicken thighs: pull at 165 to 175 degrees. Thighs actually taste better a little higher, since the extra heat melts connective tissue.
Why pull breasts early? Carryover cooking adds five to ten degrees after you remove the meat from heat. Pulling at 150 and resting to a final 160 keeps every bit of juice inside. Slicing into chicken “to check if it is done” lets juices pour out onto the cutting board — let the thermometer do the checking.
Rest Time: The Step Everyone Skips
Rest cooked chicken for five to ten minutes before slicing. During cooking, juices are driven toward the center; resting lets them redistribute through the meat. Cut too soon and those juices flood the board instead of staying in the bite. Tent the chicken loosely with foil while it rests — wrapping tightly steams the crust you just built.
Storing Meal-Prep Chicken: Cooling, Containers, and Timelines
Cool It Fast
Do not leave cooked chicken on the counter for more than two hours. Spread it on a sheet pan to cool quickly, then portion it. Refrigerate within that two-hour window to keep it food-safe.
Use Airtight Containers
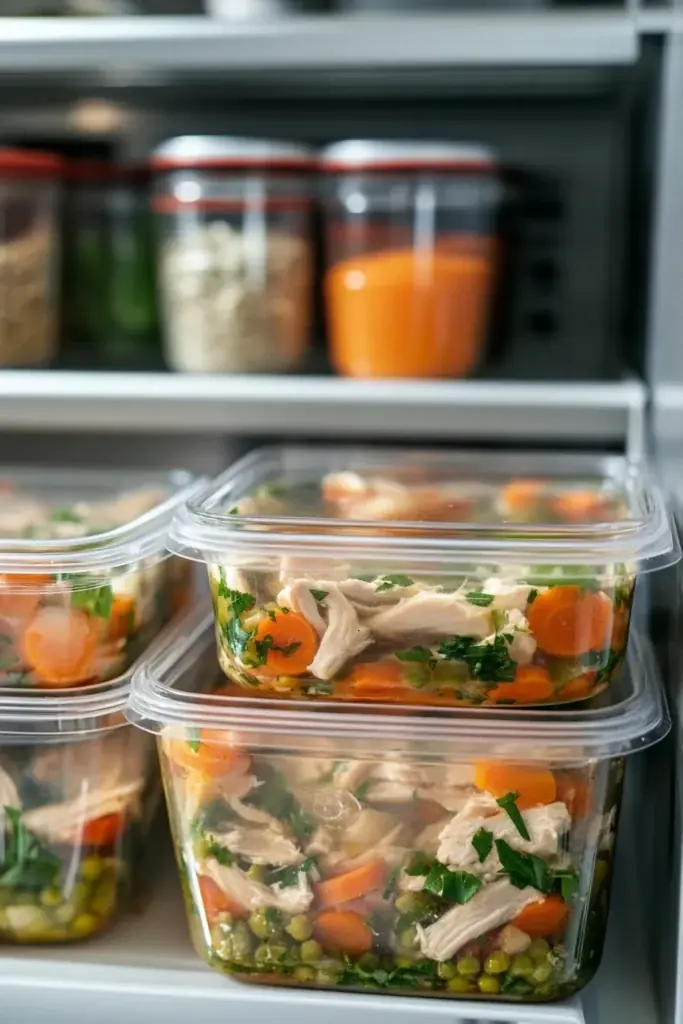
Glass containers with locking lids are ideal — they seal tightly, do not stain, and go straight from fridge to microwave. Store chicken with a splash of its cooking juices or broth poured over the top; this is a small trick with a big payoff when reheating.
Fridge and Freezer Timelines
- Refrigerator: three to four days at 40 degrees Fahrenheit or below.
- Freezer: up to three months in freezer bags with the air pressed out. Freeze in single-meal portions so you only thaw what you need.
Label every container with the date it was cooked. When in doubt, follow the rule: if it smells off or feels slimy, throw it out — no meal plan is worth a stomach bug.
Reheating Without Drying Out
Reheating is where most meal-prep chicken dies. The enemy is high, dry heat applied too long.
Best Method: Low and Covered
Sprinkle the chicken with a tablespoon of water or broth, cover it, and warm it at reduced power in the microwave or in a low oven (300 degrees) until just warmed through. The added moisture turns to steam and keeps the meat tender.
Method Comparison
- Microwave at 50 percent power: fastest; works well if you add moisture and cover. Con: can heat unevenly, so stir or rearrange halfway.
- Oven at 300 degrees, covered with foil: most even results; takes 10 to 15 minutes. Con: slowest option.
- Skillet with a splash of broth: great for sliced or shredded chicken; the broth becomes a light pan sauce. Con: needs active attention.
- Cold on purpose: shredded or sliced chicken is excellent straight from the fridge on salads, wraps, and grain bowls — zero drying risk.
Golden rule: reheat only until warm, not steaming hot. Every extra minute squeezes out more moisture.
Recipe Ideas to Build Around Your Batch
Plain cooked chicken becomes a different meal every day with the right assembly:
- Grain bowls: chicken over rice or quinoa with roasted vegetables and a drizzle of tahini or peanut sauce.
- Tacos and burritos: shredded thigh meat with salsa, slaw, and lime.
- Chicken salad: diced breast with Greek yogurt, celery, and grapes — the yogurt adds back moisture.
- Stir-fry: sliced chicken tossed at the end so it just warms through in the sauce.
- Soup: add shredded chicken in the last few minutes of simmering.
For variety in your weekly protein rotation, try alternating chicken days with plant-based options like crispy tofu made without deep frying — five easy methods that keep meal prep interesting without extra effort. And if you prep breakfasts too, fluffy pancakes without eggs pair well with a protein-heavy week since they are simple to batch-cook on a weekend morning.
Common Mistakes That Dry Out Meal-Prep Chicken
- Cooking straight from the fridge: let chicken sit at room temperature for 15 to 20 minutes first so it cooks evenly.
- Uneven thickness: pound breasts to uniform thickness or the thin end will be chalk before the thick end is done.
- Skipping the thermometer: time-based cooking ignores differences in size, starting temperature, and oven accuracy.
- Slicing immediately: always rest five to ten minutes before cutting.
- Storing it dry: add a spoonful of broth or cooking juices to the container.
- Reheating at full power: low heat with added moisture, or eat it cold on salads.
- One giant container: portion into single servings so you only reheat what you eat.
Sample 1-Hour Weekly Workflow
Here is a complete Sunday-style routine that yields five days of chicken:
- Minute 0 to 10: preheat the oven to 400 degrees. Pat chicken dry, pound breasts to even thickness, and apply a quick dry brine or oil-and-spice rub.
- Minute 10 to 35: bake on a sheet pan (or poach a second batch in broth on the stovetop at the same time). Check with a thermometer starting five minutes before you expect it done.
- Minute 35 to 45: rest the chicken ten minutes. While it rests, portion cooked grains or chopped vegetables into containers.
- Minute 45 to 60: slice or shred the chicken, add a spoonful of broth or cooking juices to each container, seal, label, and refrigerate.
Cook about two to two and a half pounds for five lunches, depending on appetite. The active hands-on time is under 20 minutes.
Troubleshooting: Rescue for Already-Dry Chicken
If a batch came out dry despite your best efforts, do not throw it away:
- Shred and sauce it: dry chicken disappears into saucy dishes — enchiladas, barbecue sandwiches, or curry.
- Warm it in broth: simmer slices gently in chicken broth for a few minutes; they will absorb some moisture back.
- Chop it fine: small pieces mixed with mayonnaise or Greek yogurt become excellent chicken salad, where the dressing compensates.
- Blend it into soup: puréed or finely shredded, no one will notice the texture.
Frequently Asked Questions
How long does meal-prep chicken last in the fridge?
Cooked chicken stays safe for three to four days in the refrigerator at 40 degrees Fahrenheit or below. Plan your batch so the last portion is eaten by day four, or freeze half the batch on cooking day and thaw it midweek.
Should I meal prep chicken breast or chicken thighs?
Thighs are more forgiving because their fat and connective tissue keep them juicy even if slightly overcooked, making them ideal for beginners. Breasts are leaner and work great once you use a thermometer and pull them at 150 to 155 degrees.
What is the best way to reheat meal-prep chicken without drying it out?
Add a tablespoon of water or broth, cover the container, and reheat gently — 50 percent power in the microwave or a 300-degree oven — only until warmed through. Alternatively, eat it cold on salads and wraps to avoid drying entirely.
Can I freeze meal-prep chicken?
Yes. Freeze portions in airtight bags with the air pressed out for up to three months. Thaw overnight in the refrigerator, never on the counter, and use within a day or two of thawing.
Why is my meal-prep chicken always dry even when I follow recipes?
The most common culprits are cooking past 165 degrees, skipping the rest before slicing, and reheating at full power. An instant-read thermometer, a five-to-ten-minute rest, and gentle reheating with added moisture fix nearly every case.
Do I need to brine chicken before meal prepping?
It is not required, but a 30-minute salt brine or a simple dry brine is the easiest way to guarantee juicy results, especially for lean chicken breasts. Think of it as cheap insurance for the whole week’s lunches.
Master these fundamentals once and they pay off every single week: juicy chicken on demand, lunches you actually enjoy, and a grocery bill that thanks you. That is the real reward of learning how to meal prep chicken for the week without it drying out.